Keeping your wireless keyboard clean is much more than a matter of looks. Dust, food crumbs, and germs collect fast, making your workspace unhealthy and even causing typing mistakes or stuck keys. Many people worry about damaging their keyboard, especially because electronics and water do not mix. The good news is, with the right steps and a bit of care, you can clean your wireless keyboard safely and keep it working like new. This guide will walk you through everything you need to know, from quick dust removal to deep cleaning, and even share tips that most users miss.
Why Cleaning Your Wireless Keyboard Matters
Every day, your hands transfer oils, sweat, and dirt to your keyboard. If you eat snacks or drink coffee at your desk, crumbs and spills are almost certain. Over time, these can lead to:
- Stuck or unresponsive keys
- Spread of bacteria and viruses
- Faded letters or sticky surfaces
- Shortened keyboard lifespan
Studies show that office keyboards can have five times more bacteria than a toilet seat. For shared keyboards, the risk is even higher. Regular cleaning keeps your workspace healthier and your keyboard functioning smoothly.
What You Need For Safe Cleaning
Before you start, gather the right tools. Using the wrong products can damage your keyboard. Here’s what you should have:
- Soft, lint-free cloth (microfiber works best)
- Cotton swabs or toothpicks
- Compressed air can
- Mild cleaning solution (like diluted rubbing alcohol)
- Small brush (a clean paintbrush or makeup brush)
- Isopropyl alcohol (at least 70%)
- Paper towels
- Keyboard keycap puller (optional, for deep cleaning)
Never use bleach, strong detergents, or too much water—these can destroy your keyboard’s electronics or wear away the surface.
Credit: www.youtube.com
Preparing Your Wireless Keyboard
Always turn off your wireless keyboard before cleaning. If it uses removable batteries, take them out to avoid any short circuits. For rechargeable keyboards, unplug them from any charging cable.
Place your keyboard on a flat, clean surface. If you plan to remove keys, take a photo of the keyboard layout first—this will help you put everything back in place.
Quick Cleaning: Everyday Maintenance
A light cleaning every few days prevents buildup and keeps your keyboard looking fresh.
- Shake it out: Hold the keyboard upside down and gently tap it to dislodge loose crumbs or dust.
- Compressed air: Spray between the keys to blow out hidden debris. Hold the can upright and use short bursts to avoid moisture buildup.
- Wipe the surface: Dampen a microfiber cloth with water or a little diluted isopropyl alcohol. Wipe the top and sides of keys, but avoid letting liquid drip between them.
Daily Cleaning Comparison
Here’s how different quick-cleaning methods stack up:
| Method | Effectiveness | Time Needed | Best For |
|---|---|---|---|
| Compressed Air | High | 2 min | Crumbs and dust removal |
| Microfiber Cloth | Moderate | 1 min | Oily fingerprints |
| Shaking Upside Down | Low | 30 sec | Loose debris |
Deep Cleaning: The Thorough Approach
For a deeper clean (about once a month or if you spill something sticky), you’ll need more time and care.
Step 1: Remove Loose Debris
Turn the keyboard upside down and gently shake again. Use compressed air to blast out stubborn crumbs and dust.
Step 2: Clean Between Keys
Dip a cotton swab in isopropyl alcohol (squeeze out excess) and run it around the base of each key. For very tight spaces, a toothpick can help dislodge stuck particles. Alcohol dries quickly and kills germs without damaging the electronics.
Step 3: Wipe Key Surfaces
Dampen a microfiber cloth with diluted alcohol (never soak it). Wipe the tops and sides of all keys, applying gentle pressure. For sticky or stained spots, rub a bit more firmly but don’t force anything.
Step 4: Remove And Clean Keycaps (if Possible)
Some wireless keyboards allow you to remove keycaps with a keycap puller. If yours does, carefully pop off the keys, but don’t force any that feel stuck. Soak the keycaps in warm, soapy water for a few minutes, then dry completely before reattaching.
Step 5: Clean The Keyboard Base
Use a dry brush or cloth to wipe down the base. If you see grime, lightly dampen the cloth with alcohol. Avoid getting liquid into the electronics.
Deep Cleaning Timeline
Here’s a typical timeline for a full deep cleaning:
| Task | Approx. Time | Frequency |
|---|---|---|
| Shaking/Compressed Air | 5 minutes | Monthly |
| Keycap Removal & Wash | 20-30 minutes (including drying) | Every 6-12 months |
| Surface Wipe-down | 5-10 minutes | Monthly |
What Not To Do: Common Mistakes
Many people make cleaning mistakes that can ruin their keyboard. Avoid these:
- Using too much liquid: Excess moisture can leak inside and fry circuits.
- Spraying cleaners directly onto the keyboard: Always spray onto a cloth first.
- Using paper towels for scrubbing: These can leave lint and scratch the surface.
- Forcing keycaps off: If a key doesn’t come off easily, leave it; some designs are not removable.
- Skipping drying time: Even a little moisture under keycaps can cause problems. Let everything dry fully before reassembling.
Disinfecting For Health
Beyond dust and crumbs, keyboards can harbor germs. After regular cleaning, disinfect with isopropyl alcohol (at least 70%). Use a new cotton swab or cloth each time to avoid spreading bacteria. Focus on the space bar and high-use keys, as these collect the most microbes.
According to the CDC, alcohol-based cleaners are effective against most viruses and bacteria found on surfaces. For shared keyboards, disinfect daily.
Special Considerations For Different Keyboard Types
Not all wireless keyboards are built the same. Here’s what to keep in mind:
Mechanical Vs. Membrane Keyboards
- Mechanical keyboards often have removable keycaps and higher durability.
- Membrane keyboards usually have softer keys and may not support easy keycap removal.
Backlit Keyboards
Be gentle when cleaning backlit models. Avoid alcohol near the light guides, as it may cloud the plastic.
Compact Or Foldable Keyboards
Smaller keyboards can trap more debris in tight spaces. Use compressed air and a fine brush for best results.
Cleaning Wireless Keyboard Accessories
Don’t forget your mouse, wrist rest, or keyboard covers. Clean these with the same care. Mouse surfaces, in particular, collect a surprising amount of grime.
Practical Tips For Keeping Your Keyboard Clean
- Wash your hands before typing: This simple habit prevents much of the dirt.
- Don’t eat over your keyboard: Crumbs and spills are the main causes of stuck keys.
- Cover when not in use: Keyboard covers or even a clean cloth can keep dust away.
- Vacuum your workspace: This reduces airborne dust landing on your keyboard.
- Inspect regularly: Catching dirt early makes cleaning much easier.
How Often Should You Clean Your Wireless Keyboard?
How often you clean depends on your habits and environment. For most people:
- Wipe the surface: Weekly
- Compressed air or brush: Every 2 weeks
- Deep clean with keycap removal: Every 6-12 months
If you share your keyboard or eat at your desk, clean more often.
Comparing Cleaning Products
Choosing the right cleaning tools can make a big difference. See how they compare:
| Product | Safe for Electronics | Germ Removal | Ease of Use |
|---|---|---|---|
| Isopropyl Alcohol (70%) | Yes | High | Easy |
| Bleach-based Cleaner | No | High | Risky |
| Compressed Air | Yes | Low | Very Easy |
| Microfiber Cloth | Yes | Medium | Very Easy |
Non-obvious Insights Most People Miss
- Keycap orientation matters: When removing several keys, they only fit one way. Take a photo first so you don’t mix up the layout, especially for non-standard keyboards.
- Compressed air can leave moisture: If you use a can too long, cold propellant may add moisture. Let the keyboard air dry for a few minutes before turning it on.
When To Replace Your Keyboard
Sometimes, even the best cleaning cannot fix old or heavily damaged keyboards. If your keys remain sticky, letters are worn off, or the keyboard does not respond after cleaning, it may be time to invest in a new one. High-quality keyboards can last for years with regular care.
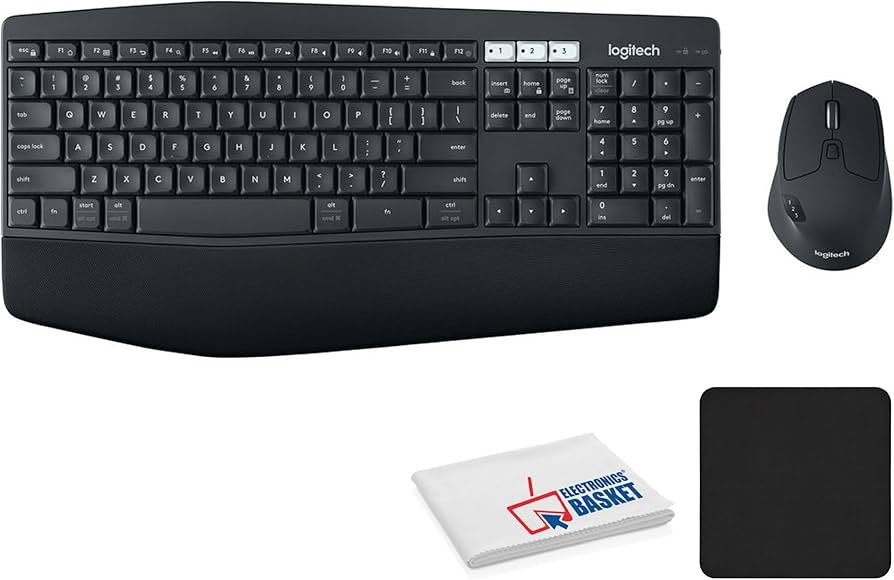
Credit: www.amazon.com
Learn More
For extra tips on electronics cleaning, see the CDC guidelines on surface disinfection.
Frequently Asked Questions
How Often Should I Clean My Wireless Keyboard?
For most people, a light cleaning every week and a deep cleaning every 6 to 12 months is enough. Clean more often if you share your keyboard or eat at your desk.
Can I Use Water To Clean My Keyboard?
Use water only in small amounts on a cloth. Never pour or spray water directly onto your keyboard, as this can damage the electronics.
Is It Safe To Remove Keycaps From A Wireless Keyboard?
Many mechanical keyboards allow safe keycap removal, but not all wireless models do. Check your keyboard’s manual, and never force keycaps that seem stuck.
What Is The Best Way To Disinfect My Keyboard?
Use a cloth lightly dampened with isopropyl alcohol (at least 70%) to wipe the keys and surface. This kills germs without harming electronics.
What Should I Avoid When Cleaning My Wireless Keyboard?
Avoid harsh chemicals, too much water, and abrasive materials. Never spray liquid directly onto the keyboard, and always let parts dry completely before use.
Keeping your wireless keyboard clean is simple once you know what to do. With regular care and the right habits, you’ll enjoy smooth, healthy typing for years to come.
Credit: www.oddgifts.com
Related Office Guides
Continue with these related workspace guides:
