Keyboards are one of the most-touched items in our daily life—at home, at work, in schools, and public places. Each time you type, your fingers transfer oils, sweat, and even germs to the keys. Over time, dust and crumbs slip between the keys too. Researchers have found that a typical computer keyboard can have more bacteria than a toilet seat. This is not just unpleasant; it can make you sick, especially during cold and flu season, or if you share your device with others.
Learning how to disinfect a keyboard is essential for your health, computer performance, and peace of mind. With the right methods, you can easily remove bacteria, viruses, and dirt, without damaging your device. This complete guide will walk you through every step—from preparation, to cleaning, to post-disinfection care. Whether you have a laptop, desktop keyboard, or even a gaming keyboard, you’ll find practical advice and tips you can trust.
Why Disinfecting Your Keyboard Matters
Most people don’t realize how dirty their keyboards get. In one study, scientists swabbed office keyboards and found five times more germs than on the average toilet seat. The main reasons are:
- Frequent Touching: Keyboards are touched by hands all day, transferring sweat, oil, and bacteria.
- Shared Use: In offices, schools, and homes, keyboards are often used by more than one person.
- Eating at Your Desk: Food crumbs and drink spills create a breeding ground for germs.
- Lack of Cleaning: Most people clean their screens, but rarely disinfect their keyboards.
Germs on your keyboard can lead to stomach bugs, colds, or even skin infections. Disinfection is also important if you have allergies—dust and dirt can trigger symptoms. For people working in healthcare, education, or public spaces, cleaning keyboards regularly is not just a good habit; it’s often a requirement.
What You Need Before You Start
Before you disinfect your keyboard, gather the right supplies. Using the wrong products can damage your keys, erase letters, or leave sticky residues. Here’s what you’ll need:
- Soft, lint-free cloths: Microfiber cloths are best. Avoid paper towels, which can leave lint.
- Cotton swabs: For cleaning between and under the keys.
- Compressed air canister: Blows out dust and crumbs.
- Disinfectant wipes: Must be alcohol-based (at least 70% isopropyl alcohol).
- Isopropyl alcohol (70% or higher): For deep cleaning—never use bleach or ammonia.
- Small bowl: To hold the alcohol if using a cloth or swab.
- Plastic gloves: Optional, for extra hygiene.
- Toothpick or soft brush: Helps dislodge stubborn dirt.
Important: Never use bleach, window cleaners, or products with strong chemicals. They can damage the plastic and erase printed letters.
Preparation: Safety First
Disinfecting a keyboard is safe and easy, but only if you do it correctly. Always follow these steps before you start:
- Turn off your computer and unplug the keyboard if possible. For laptops, shut down and remove the battery if you can.
- Unplug all cables and devices. For wireless keyboards, remove the batteries.
- Shake out loose debris by gently turning the keyboard upside down and tapping it.
- Read your keyboard’s manual. Some high-end keyboards, especially gaming models, have special coatings or removable keycaps.
A common mistake is to spray liquid directly on the keyboard. Never do this; it can cause short circuits or sticky keys.
Step-by-step: How To Disinfect Your Keyboard
Let’s break the process down into simple, clear steps. Each step serves a purpose, so don’t skip any.
Step 1: Remove Loose Debris
Start by turning the keyboard upside down and gently shaking it. This will remove loose crumbs, dust, and hair. For best results, do this over a trash can or outside.
- Hold the keyboard at a slight angle and tap it with your hand.
- For stubborn debris, use a soft brush or a toothpick to gently loosen particles.
Step 2: Use Compressed Air
A can of compressed air is very effective for blasting out dirt from between and under the keys.
- Hold the can upright and use short bursts.
- Aim the nozzle at an angle to force debris out, not deeper in.
- Move row by row, making sure you cover the whole keyboard.
Non-obvious tip: Don’t hold the can too close—about 1–2 inches away is best. Holding it too close can cause condensation, which may damage the keyboard.
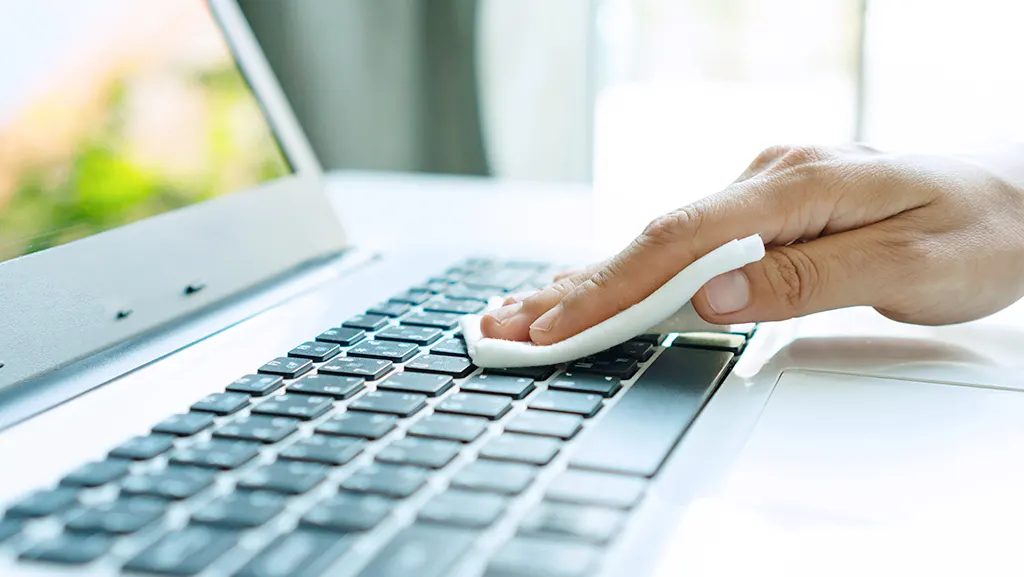
Step 3: Wipe Down The Surface
Now, take a disinfectant wipe or a microfiber cloth dampened (not soaked) with isopropyl alcohol.
- Gently wipe the tops of all keys and the keyboard frame.
- Use a circular motion for stubborn spots.
- Re-fold the cloth or use a new wipe when it gets dirty.
Important: The cloth should be damp, not dripping. Excess liquid can seep under the keys and cause damage.
Step 4: Clean Between The Keys
This is a step many people skip, but it’s where germs often hide.
- Dip a cotton swab in isopropyl alcohol and squeeze out extra liquid.
- Run the swab between the keys and along the edges.
- For laptop keyboards, be extra gentle to avoid damaging the keys.
If you see sticky residue, use a new swab for each row.
Step 5: Deep Clean (optional)
If your keyboard is very dirty, consider removing the keycaps for a deep clean. This works best for mechanical or gaming keyboards.
- Take a photo first, so you know where each key goes.
- Use a keycap puller or gently pry up each key with a flat tool.
- Clean the keycaps in warm, soapy water. Rinse and dry completely.
- Wipe the keyboard base with a microfiber cloth and alcohol.
- Let everything dry for at least 1 hour before reassembling.
Non-obvious insight: Never soak keycaps with printed letters in alcohol for a long time—this can erase the letters.
Step 6: Disinfect The Keyboard Frame
Don’t forget the frame around the keys and the underside of the keyboard. These areas collect skin oils and bacteria too.
- Use a disinfectant wipe or a cloth with alcohol.
- Pay extra attention to corners and crevices.
Step 7: Let It Dry
Before plugging the keyboard back in or using your laptop, let the keyboard air dry for at least 10 minutes. If you removed the keycaps or used a lot of liquid, wait 1 hour.
Tip: Never use a hair dryer or place the keyboard in direct sunlight to speed up drying. This can warp the plastic.

Credit: news.iu.edu
Special Cases: Laptop, Gaming, And Mechanical Keyboards
Not all keyboards are the same. Here’s how to handle some common variations.
Laptop Keyboards
Laptops are delicate, so be extra careful.
- Never use too much liquid—just a slightly damp cloth.
- Use compressed air gently to avoid damaging the thin key mechanisms.
- For sticky keys, use a cotton swab with alcohol.
If you spill liquid on a laptop keyboard, turn off the device immediately, unplug it, and let it dry upside down. If the liquid was sugary or sticky, have a professional clean it.
Mechanical Keyboards
These are popular with gamers and professionals.
- Most have removable keycaps for easier cleaning.
- Use a keycap puller for safe removal.
- Under the keycaps, use a brush or compressed air to remove dust.
- Clean the keycaps with mild soap and water, but make sure they’re fully dry before reattaching.
Gaming Keyboards
Gaming keyboards often have special lighting (RGB LEDs) and coatings.
- Always check the manufacturer’s cleaning instructions.
- Avoid strong chemicals that can damage the backlighting or special coatings.
- Use a microfiber cloth and alcohol for the best balance of cleaning and safety.
Comparison: Disinfectant Types For Keyboards
Cleaning products are not all the same. Here’s a comparison to help you choose the safest option:
| Disinfectant Type | Safe for Keyboards? | Effectiveness | Common Risks |
|---|---|---|---|
| Isopropyl Alcohol (70%+) | Yes | High | Can erase printed letters if used too much |
| Alcohol-based Wipes | Yes | High | Safe if not too wet |
| Bleach/Chlorine | No | High | Damages plastic, erases keys |
| Ammonia-based Cleaners | No | Medium | Damages keyboard finish |
| Soap and Water | Yes (for keycaps only) | Medium | Only for removable parts |
How Often Should You Disinfect Your Keyboard?
How often you need to disinfect your keyboard depends on how you use it:
- Daily: If you share your keyboard with others, or if you work in healthcare or public spaces.
- Weekly: For home users, especially if you eat at your desk or have allergies.
- After Illness: Always disinfect after being sick or if someone near you is unwell.
- Monthly: At a minimum, for keyboards that see light use.
Pro tip: Set a reminder to clean your keyboard regularly. Many people forget until the keys become sticky or visibly dirty.
Mistakes To Avoid When Disinfecting
Many people damage their keyboards by making simple mistakes. Here are the most common ones:
- Using too much liquid: Excess moisture can seep into the keyboard and cause it to stop working.
- Spraying directly on the keyboard: Always apply cleaner to the cloth, not the device.
- Using harsh chemicals: Bleach and ammonia will damage the plastic and lettering.
- Forgetting to unplug the keyboard: This can lead to short circuits.
- Not letting the keyboard dry: Using it when wet can cause permanent damage.

Credit: www.wired.com
Data: Germs And Keyboards
To understand the real risks, look at what the science says:
- A 2018 study found that keyboards can have up to 3,000 bacteria per square inch.
- In offices, keyboards are touched up to 50 times per hour by different people.
- Some studies have found E. coli and Staphylococcus bacteria on shared keyboards.
This data shows why regular disinfection is so important, especially in shared spaces.
Quick Reference: Cleaning Different Keyboard Types
To help you choose the right method, here’s a quick comparison:
| Keyboard Type | Best Cleaning Method | Special Notes |
|---|---|---|
| Laptop Keyboard | Microfiber cloth, alcohol wipe, compressed air | Be gentle, avoid excess liquid |
| Standard Desktop Keyboard | All steps, can remove keycaps if needed | Unplug before cleaning |
| Mechanical Keyboard | Remove keycaps, deep clean with soap | Let keycaps dry fully before reattaching |
| Gaming Keyboard | Alcohol wipes, soft brush | Check for special coatings or lighting |
Pro Tips For A Cleaner Keyboard
- Wash your hands before using your computer to reduce germs.
- Avoid eating and drinking at your desk.
- Use a keyboard cover if you work in dusty or shared environments. Covers are easy to remove and wash.
- Store your keyboard in a clean, dust-free space when not in use.
If you often travel with a laptop, carry a small pack of alcohol wipes for quick clean-ups.
What To Do After Disinfecting
Once your keyboard is dry and clean, check that all keys work correctly. If you removed keycaps, test each key for proper movement.
- Plug in or turn on your keyboard.
- Press every key to make sure none are stuck.
- If a key feels sticky, repeat the cleaning process for that area.
If you used a lot of alcohol, you may notice the keys feel smoother. This is normal and means oils and dirt have been removed.
When To Replace Your Keyboard
Sometimes, a keyboard is too dirty or damaged to save. Signs it’s time to replace:
- Keys no longer work after cleaning and drying.
- Sticky or jammed keys that don’t improve after multiple cleanings.
- Faded or unreadable letters, making typing hard.
- Cracks or broken parts that let in more dirt.
A good keyboard can last years with proper care, but if cleaning doesn’t solve the problem, it’s safer and easier to replace it.
Key Differences: Cleaning Vs. Disinfecting
Many people confuse cleaning and disinfecting. Here’s how they differ:
| Action | Purpose | Tools Used | Result |
|---|---|---|---|
| Cleaning | Remove dirt and dust | Dry cloth, brush, compressed air | Looks clean, but may still have germs |
| Disinfecting | Kill germs and viruses | Alcohol, disinfectant wipes | Reduces risk of illness |
For the best results, always clean first, then disinfect.
Extra: Cleaning Keyboards In Shared Spaces
In schools, offices, and public libraries, keyboards are shared by many people. Special care is needed:
- Disinfect multiple times a day, especially during flu season.
- Provide disinfectant wipes nearby for users.
- Encourage everyone to wash hands before and after use.
- Use keyboard covers that can be washed or replaced often.
Some institutions use UV sanitizers for quick, touchless disinfection, but these are expensive and not always practical at home.
For Professionals: Hospital And Lab Keyboards
In healthcare and lab settings, keyboard disinfection is part of infection control. Guidelines often include:
- Disinfect after every use or patient contact.
- Use alcohol-based wipes only—never bleach.
- Consider sealed, washable keyboards for the highest safety.
For the latest official advice, check sources like the CDC Environmental Infection Control Guidelines.
Credit: www.asurion.com
Frequently Asked Questions
What Is The Safest Way To Disinfect A Laptop Keyboard?
Use a microfiber cloth dampened with isopropyl alcohol (at least 70%). Gently wipe the keys and frame. Never pour liquid directly or use harsh chemicals. Let the keyboard dry before turning your laptop back on.
Can I Use Hand Sanitizer To Clean My Keyboard?
Hand sanitizer is not recommended. It often contains gels and perfumes that can leave residue. Use isopropyl alcohol or disinfectant wipes designed for electronics instead.
How Do I Clean Sticky Keys?
Remove the keycap if possible, then clean the area with a cotton swab and alcohol. For laptop keyboards, use a swab gently around the key. If the key stays sticky, repeat the process or seek professional help.
Is It Safe To Use Disinfectant Sprays On Keyboards?
Do not spray directly onto the keyboard. Instead, spray the disinfectant onto a soft cloth and wipe the keys. Too much liquid can damage the electronics inside.
How Often Should Keyboards In Shared Spaces Be Disinfected?
Ideally, after each user. At a minimum, disinfect several times a day, especially during flu season or outbreaks. Encourage users to wash hands before and after use for best results.
Keeping your keyboard clean and disinfected is an easy step that protects your health and improves your typing experience. With these simple, science-backed tips, you can enjoy a safer, longer-lasting keyboard every day.
Related Office Guides
Continue with these related workspace guides:
