Mechanical keyboards are more than just tools for typing or gaming—they’re investments in comfort, durability, and performance. But just like any valuable device, regular cleaning is essential to keep your keyboard working well and looking good. Dirt, dust, crumbs, and even oil from your fingers can build up over time, causing sticky keys and even hardware problems.
If you want your mechanical keyboard to last for years and always feel great to use, learning how to clean it properly is a must.
Many users hesitate to clean their keyboards, worrying about damaging the switches or losing tiny parts. The truth is, with a careful approach and the right steps, you can clean your keyboard deeply and safely—even if you’re a complete beginner.
In this guide, you’ll find everything you need to know, from basic dusting to full deep cleaning, plus tips to avoid common mistakes. Whether you use your keyboard for work, gaming, or both, this guide will help you keep every key crisp and every switch smooth.
Why Cleaning Your Mechanical Keyboard Matters
A clean keyboard does more than look nice. Over time, dust, hair, and food particles can slip between the keys and affect how your keyboard works. Sticky or unresponsive keys are often caused by debris inside the switches. Plus, bacteria can grow on keys, especially if you snack while typing, which isn’t just gross but can also affect your health.
Regular cleaning also helps:
- Preserve switch lifespan—dirt can wear out mechanical switches faster.
- Maintain typing comfort—smooth, clean keys feel better to use.
- Prevent hardware issues—liquids and debris can cause shorts or corrosion.
Most people don’t realize that even a little bit of dust can slowly damage a keyboard over months. A simple 10-minute clean once a week can prevent most long-term problems.
What You’ll Need: Tools And Supplies
Before you start cleaning, gather these common tools. Many are probably already in your home.
- Soft brush or paintbrush: For dusting between keys.
- Keycap puller: Helps remove keycaps safely.
- Compressed air can: Blows out trapped dust.
- Microfiber cloth: Wipes surfaces without scratching.
- Cotton swabs: Cleans tight spaces.
- Mild dish soap: For washing keycaps.
- Small bowl: To soak keycaps.
- Tweezers: Picks out stubborn crumbs or hairs.
- Isopropyl alcohol (70% or higher): Disinfects and removes oil.
- Toothpick: Gets into tiny crevices.
Never use strong chemicals or rough sponges—they can damage the finish or remove the legends from keycaps.
Basic Cleaning: Quick And Safe Steps
If you want to clean your keyboard without taking it apart, follow these steps. This routine is good for weekly cleaning and helps prevent grime buildup.
- Unplug the keyboard—Always disconnect it first to avoid any risk.
- Turn the keyboard upside down—Gently shake to remove loose debris.
- Brush between the keys—Use a soft brush to sweep out crumbs and dust.
- Use compressed air—Hold the can upright and spray between keys. Short bursts work best.
- Wipe the surface—Dampen a microfiber cloth slightly (never dripping wet) with water or isopropyl alcohol and wipe all surfaces.
- Clean key faces—For sticky keys, use a cotton swab dipped in alcohol to gently scrub each keycap.
Never spray cleaner directly onto your keyboard. Always apply it to your cloth first.
Deep Cleaning: Removing Keycaps For A Full Refresh
For a thorough clean, you’ll need to remove the keycaps. This is usually safe for most mechanical keyboards, but always check your keyboard’s manual if you’re unsure.
How To Remove Keycaps
- Unplug your keyboard and move to a clean, flat surface.
- Use a keycap puller—Place it over the keycap and pull straight up. For larger keys like the spacebar, be gentle and wiggle slightly if needed.
- Set keycaps aside—Keep them in a bowl so you don’t lose any.
Washing The Keycaps
- Soak in warm, soapy water—Fill a bowl with warm water and a drop of dish soap. Let the keycaps soak for 30–60 minutes.
- Scrub if needed—Use a soft brush or cloth to remove any stubborn grime.
- Rinse and dry—Rinse thoroughly with clean water. Lay keycaps out on a towel and let them dry fully (this may take a few hours or overnight).
Cleaning The Keyboard Base
- Brush away dust—Use your brush or compressed air to remove all debris.
- Clean with alcohol—Dampen a microfiber cloth or cotton swab with isopropyl alcohol to clean around the switches and inside the case.
- Check for spills—If you see sticky spots, use a cotton swab or toothpick to gently clean them.
Reinstalling Keycaps
Make sure every keycap is completely dry before putting them back. Press each one down firmly until it snaps into place.

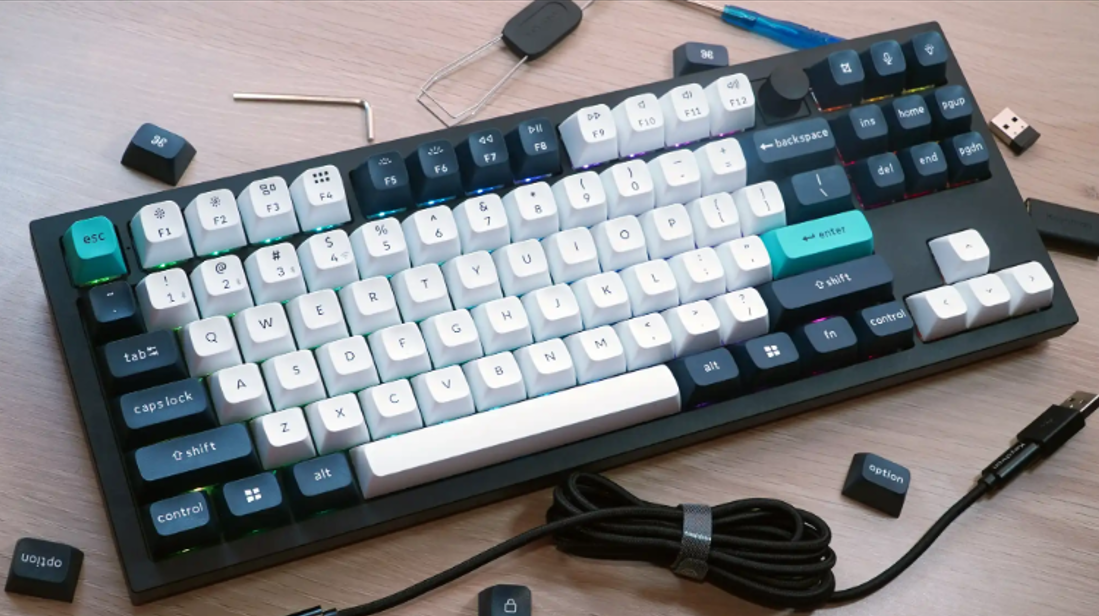
Credit: kineticlabs.com
Cleaning Different Keyboard Types
Not all mechanical keyboards are the same. Some have special features that need extra care.
Rgb Backlit Keyboards
- Avoid water near LEDs—Never let water sit near light sources.
- Use compressed air and a slightly damp microfiber cloth for cleaning.
Hot-swappable Keyboards
- Remove switches carefully—If your keyboard allows, you can pull out the switches for even deeper cleaning. Only do this if you’re comfortable handling small parts.
Custom Or High-end Keyboards
- Check the manufacturer’s advice—Some custom keyboards use special materials. Always follow their cleaning recommendations.
How Often Should You Clean Your Mechanical Keyboard?
The ideal cleaning schedule depends on how much you use your keyboard.
- Light use (1–2 hours a day): Quick cleaning every two weeks, deep clean every 3–4 months.
- Heavy use (gaming, office work): Quick cleaning once a week, deep clean every 1–2 months.
- Pet owners or frequent snackers: Clean more often, as hair and crumbs build up quickly.
A 2023 survey by the International Mechanical Keyboard Community found that users who cleaned their keyboards monthly had 60% fewer key failures than those who never cleaned theirs.
Mistakes To Avoid When Cleaning
Many beginners accidentally damage their keyboards. Here’s how to avoid common pitfalls:
- Using too much water—Moisture can seep inside and short the electronics.
- Reinstalling wet keycaps—Trapped water can damage switches.
- Pulling keycaps at an angle—This can bend or break stems.
- Using harsh chemicals—Bleach, window cleaner, or acetone can fade legends or melt plastic.
- Forgetting the cable—Clean your USB or detachable cable with a dry cloth.
Practical Tips For Keeping Your Keyboard Clean Longer
- Wash your hands before typing to reduce oil transfer.
- Don’t eat over your keyboard—Crumbs are the number one cause of stuck keys.
- Keep a dust cover on your keyboard when not in use.
- Vacuum your desk area weekly to cut down on airborne dust.
Non-obvious insight: Even the air quality in your room affects keyboard cleanliness. Rooms with open windows or pets see more debris build-up.

Credit: epomaker.com
Comparing Keyboard Cleaning Methods
To help you choose the best cleaning method, here’s a comparison of basic, deep, and professional cleaning:
| Method | Time Needed | Tools Required | Effectiveness | Skill Level |
|---|---|---|---|---|
| Basic Cleaning | 10–15 minutes | Brush, cloth, compressed air | Good for surface dirt | Beginner |
| Deep Cleaning | 1–2 hours (includes drying) | Keycap puller, soap, bowl, brush, air | Removes all debris, disinfects | Intermediate |
| Professional Cleaning | 2–4 hours | Special tools, sometimes soldering | Complete restoration | Advanced |
For most people, deep cleaning a few times a year is enough.
Step-by-step Deep Cleaning Example
Let’s walk through a real-world deep cleaning process for a tenkeyless mechanical keyboard:
- Unplug and remove the cable.
- Take a photo of your keyboard layout for reference.
- Remove all keycaps with a puller, storing them in a bowl.
- Soak keycaps in warm, soapy water. Set aside.
- Blow out dust from the keyboard with compressed air.
- Brush the base and between switches with a soft brush.
- Spot clean sticky areas with isopropyl alcohol on a cotton swab.
- Rinse and dry keycaps fully before reinstalling.
- Reassemble using your photo to get the layout right.
This process takes about 90 minutes, including drying time.
Popular Cleaning Products Compared
Here’s a comparison of three common cleaning products you might use:
| Product | Safe for Electronics | Removes Oil | Ease of Use | Cost |
|---|---|---|---|---|
| Compressed Air | Yes | No | Very Easy | Low |
| Isopropyl Alcohol | Yes (if 70%+) | Yes | Easy | Low |
| Cleaning Gel | Check label | Somewhat | Easy | Medium |
Always check that cleaning gels are safe for your specific keyboard—some can leave residue.
When To Seek Professional Help
If your keyboard has liquid damage, keys that won’t work after cleaning, or if you aren’t comfortable taking it apart, professional cleaning or repair is a smart choice. Some shops have ultrasonic cleaners that can restore even heavily soiled boards.
Where To Learn More
For more detailed cleaning guides and advanced techniques, check out this resource from the Wikipedia Mechanical Keyboard page.
Frequently Asked Questions
How Often Should I Clean My Mechanical Keyboard?
For most people, a quick clean every 1–2 weeks and a deep clean every few months is enough. If you eat at your desk or have pets, clean more often.
Can I Put My Keycaps In The Dishwasher?
It’s not recommended. Dishwashers can use harsh detergents and high heat that may fade legends or warp plastic. Hand washing in warm, soapy water is safer.
What Should I Do If I Spill Liquid On My Keyboard?
Unplug the keyboard immediately, remove all keycaps, and dry everything thoroughly. If possible, open the case to let it air out. Do not use the keyboard until you are sure it is completely dry.
Is It Safe To Use Alcohol Wipes On My Keyboard?
Yes, as long as the wipes are not soaked and you avoid getting liquid into the switches. Isopropyl alcohol (70%+) is best because it evaporates quickly.
My Keys Are Still Sticky After Cleaning. What Should I Do?
Double-check that all residue is gone. Sometimes, sticky switches need to be cleaned from inside, which may require removing the switch or professional help.
Keeping your mechanical keyboard clean doesn’t have to be complicated. With the right tools, a bit of patience, and regular care, your keyboard will stay smooth, responsive, and enjoyable to use for years.
Credit: credkeys.com
Related Office Guides
Continue with these related workspace guides:
