Cleaning under your keyboard might sound simple, but it’s one of those tasks that many people avoid until it becomes a problem. Dust, crumbs, hair, and even spilled drinks can find their way under the keys, causing sticky buttons, strange noises, or unresponsive areas.
If you use your keyboard every day—whether for work, gaming, or browsing—knowing how to clean it properly can extend its life and give you a better typing experience.
Most people only wipe the top of their keyboard, but real dirt hides under the keys. This area collects more debris than you might expect. Over time, the build-up can affect your keyboard’s performance and hygiene. If you’ve ever wondered why some keys feel stiff or why your keyboard has a persistent smell, the answer usually lies beneath the keys.
Cleaning under your keyboard is not just about looks—it’s also about keeping your device working smoothly and preventing germs.
Let’s walk through everything you need to know, from basic cleaning to deep cleaning methods, so you can keep your keyboard as fresh as new.
Why Cleaning Under Your Keyboard Matters
Many people underestimate the importance of cleaning under their keyboard. However, this simple habit can have a big impact:
- Reduces germs: Keyboards can harbor more bacteria than a toilet seat.
- Prevents sticky keys: Dust and food particles can cause buttons to stick or not register.
- Extends keyboard life: Regular cleaning stops internal damage and keeps components healthy.
- Improves appearance: A clean keyboard looks and feels better, especially in shared spaces.
Research shows that desktop keyboards can contain up to 7,500 bacteria per swab, especially in offices or public settings. For people who eat at their desks, the amount of food debris and crumbs can be significant. Ignoring this can lead to allergies or even minor electrical problems if liquids or sticky substances get inside.
Types Of Keyboards And Cleaning Difficulty
Not all keyboards are the same. The design affects how easy it is to clean under the keys.
| Keyboard Type | Ease of Cleaning | Special Considerations |
|---|---|---|
| Standard Desktop (Membrane) | Moderate | Keycaps may be harder to remove |
| Mechanical Keyboard | Easy | Individual keycaps are simple to detach |
| Laptop Keyboard | Difficult | Keys are shallow; removal can void warranty |
| Chiclet Keyboard | Moderate | Flat keys, less space for debris but harder to remove caps |
Knowing your keyboard type helps you choose the safest and most effective cleaning method.
What You Need Before You Start
Cleaning under your keyboard doesn’t require expensive tools. However, having the right items can make the process easier and safer:
- Compressed air can (for blowing out dust)
- Small brush (paintbrush or old toothbrush)
- Keycap puller (for mechanical keyboards)
- Cotton swabs
- Isopropyl alcohol (70% or higher)
- Microfiber cloth
- Tweezers (for stuck debris)
- Plastic or wooden stick (for gentle prying)
- Vacuum with brush attachment (optional)
- Small bowl or tray (to keep keycaps organized)
- Mild dish soap (for deep cleaning keycaps)
Don’t use metal tools, as these can scratch or damage the plastic and electronic parts.
Quick Clean Vs. Deep Clean: What’s The Difference?
There are two levels of cleaning under your keyboard: quick and deep. Choose based on how dirty your keyboard is and how much time you have.
- Quick clean: Best for regular maintenance. No need to remove keycaps.
- Deep clean: Ideal for sticky, smelly, or very dirty keyboards. Keycaps are removed for full access.
Quick cleaning can be done once a week, while a deep clean is recommended every few months or after spills.
Step-by-step: Quick Clean Under Your Keyboard
If you want to remove surface debris and dust without taking apart your keyboard, follow these steps:
- Turn off and unplug your keyboard (or power off your laptop).
- Flip the keyboard upside down and gently shake it. Tap the back to dislodge loose debris.
- Use compressed air to blow out dust from between the keys. Hold the can upright and spray at an angle.
- Brush between the keys with a soft brush. Move in all directions to catch hidden particles.
- Vacuum the surface with a brush attachment if you have one. This is optional but effective.
- Wipe the top of the keys with a microfiber cloth slightly dampened with isopropyl alcohol. This removes oils and germs.
This method keeps your keyboard looking good and prevents build-up but doesn’t reach deeply stuck dirt.
Step-by-step: Deep Cleaning Under Your Keyboard
For a more thorough cleaning, especially if you notice sticky or unresponsive keys, follow these detailed steps:
1. Power Down And Disconnect
Always unplug your keyboard or power off your laptop before cleaning. This prevents accidental key presses and protects you from shocks.
2. Take A Photo Of Your Keyboard Layout
Before removing any keys, use your phone to snap a clear photo of the keyboard. This will help you put the keys back in the correct order, especially for non-standard layouts.
3. Remove The Keycaps
For mechanical and some desktop keyboards, use a keycap puller or gently pry off the keycaps with a plastic stick. Work slowly to avoid breaking the clips. For laptops and chiclet keyboards, check the manual—removal can be risky and may void your warranty.
Place the keycaps in a bowl or tray to keep them organized.
4. Clean The Exposed Area
Once the keycaps are off:
- Use a soft brush to sweep away loose dust and crumbs.
- Blow out remaining particles with compressed air.
- Pick out larger debris with tweezers.
5. Disinfect And Remove Sticky Residue
Dampen a cotton swab with isopropyl alcohol and gently clean around the switches and in the spaces between. For stubborn dirt, repeat with a fresh swab. Never pour liquid directly onto the keyboard.
6. Clean The Keycaps Separately
Mix a small amount of mild dish soap in warm water. Soak the keycaps for 10-15 minutes, then gently scrub with a brush. Rinse and dry them completely before reattaching. Wet keycaps can cause electrical damage if placed back too soon.
7. Reassemble Your Keyboard
Match the keycaps to your photo and press them back onto the switches. Make sure each one clicks into place. Reconnect the keyboard and test every key to ensure proper function.
Special Tips For Laptop Keyboards
Laptop keyboards are tricky. The keys are shallow and more delicate. Here’s how to clean under them safely:
- Avoid removing keycaps unless you are experienced or have the manufacturer’s guide.
- Use a soft brush and compressed air only.
- For sticky areas, dip a cotton swab in alcohol and gently clean around the key edges.
- If liquid was spilled, turn off the laptop, unplug, and let it dry completely before use.
If a key is stuck or not working after cleaning, contact professional service rather than forcing repairs.
What To Do After Spilling On Your Keyboard
Spills are a common reason for deep cleaning. If you spill water, coffee, or soda on your keyboard, act fast:
- Turn off and unplug the device immediately.
- Flip the keyboard upside down to drain as much liquid as possible.
- Blot the surface with a dry cloth. Do not wipe, as this can push liquid further in.
- Remove keycaps (if possible) and dry the area.
- Let the keyboard air-dry for at least 24 hours before using again.
Sugary or sticky drinks may need extra cleaning with alcohol and a brush. If the keyboard doesn’t work after drying, it may need professional repair or replacement.
How Often Should You Clean Under Your Keyboard?
The right cleaning schedule depends on usage. For most people:
- Light use (home, no food): Every 2-3 months
- Heavy use (office, gaming, food nearby): Every month
- After spills or illness: Immediately
Frequent cleaning also reduces allergies and keeps your work environment healthier.
Common Mistakes To Avoid
Even with the right tools, some mistakes can cause more harm than good:
- Using too much liquid: This can damage the electronics.
- Forcing keycap removal: Can break clips or switches.
- Ignoring the manual: Some keyboards have unique layouts or fragile parts.
- Skipping drying time: Wet keycaps or parts can short-circuit the device.
- Using metal tools: These scratch and break plastic components.
Always work gently, and if you’re unsure, start with surface cleaning only.
Credit: www.reddit.com
Comparing Cleaning Tools: What Works Best?
Choosing the right tool makes cleaning easier and safer. Here’s a simple comparison:
| Tool | Best Use | Pros | Cons |
|---|---|---|---|
| Compressed Air | Dust removal | Fast, reaches tight spaces | Not reusable, can freeze if misused |
| Soft Brush | Loose debris | Gentle, reusable | May miss fine dust |
| Vacuum | Surface crumbs | Powerful, effective | Can be too strong for delicate keys |
| Isopropyl Alcohol | Sanitizing, sticky residue | Kills germs, dries fast | Must avoid excess liquid |
| Keycap Puller | Mechanical keyboards | Prevents damage | Not useful for laptop keys |
How To Clean Under Keyboard Without Special Tools
If you don’t have cleaning gadgets, you can still do a decent job:
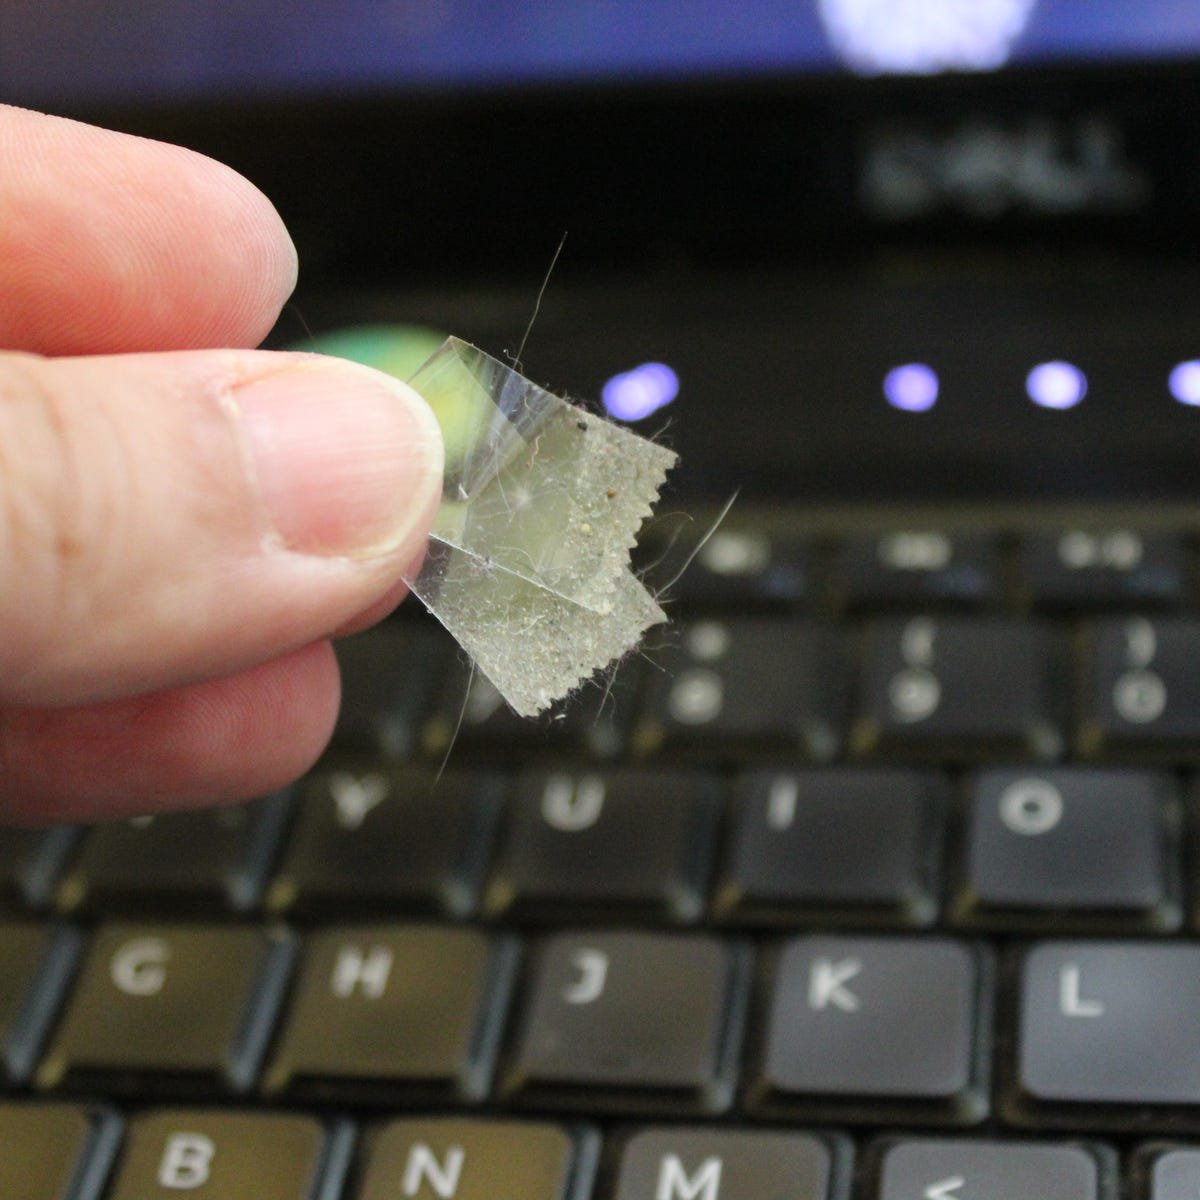
- Use sticky notes: Slide the sticky edge between keys to pick up dust and hair.
- Blow gently: Use your mouth to blow out crumbs if you don’t have compressed air (not as effective, but better than nothing).
- Paintbrush or makeup brush: These are gentle enough for cleaning around keys.
- Tape: Wrap a small piece of tape (sticky side out) around your finger and dab between keys.
These DIY methods work for light dirt but are less effective for deep cleaning.
The Hidden Dangers Of A Dirty Keyboard
Keeping your keyboard clean is about more than just appearance:
- Bacterial build-up: Studies show keyboards can be dirtier than toilet seats, especially in shared or public spaces.
- Allergy triggers: Dust, pet hair, and food can cause sneezing or itching.
- Electrical issues: Liquids and sticky substances can short-circuit your keyboard or cause keys to stop working.
- Odor: Old food and spills can cause bad smells over time.
A clean keyboard is safer, healthier, and more pleasant to use. For more on hygiene, see this Wikipedia entry on keyboard hygiene.
Signs Your Keyboard Needs Cleaning
Not sure when it’s time for a deep clean? Watch for these signs:
- Sticky or unresponsive keys
- Visible crumbs or hair
- Keys that squeak or stick
- Odors coming from the keyboard
- Keys that feel uneven
Ignoring these signs can lead to more serious issues or permanent damage.
Cleaning For Shared And Office Keyboards
If you share your keyboard with others or work in a public office, cleaning is even more important. Shared keyboards spread germs and viruses quickly. In these cases:
- Clean the keyboard at least once a week.
- Use disinfecting wipes for a quick daily clean.
- Never use the keyboard with dirty or sticky hands.
- Avoid eating directly over the keyboard.
Office managers can set up cleaning schedules and provide wipes or cleaning kits to staff.
How To Store And Protect Your Keyboard
After cleaning, protect your keyboard from future mess:
- Use a keyboard cover: These silicone covers are easy to remove and clean.
- Keep food and drinks away from your desk.
- Store your keyboard in a drawer or cover it when not in use.
- Wash your hands before typing to reduce oil and dirt transfer.
Taking these steps will extend the time between deep cleans and maintain a better typing experience.
Credit: www.reddit.com
How Professional Cleaning Differs
Sometimes, home cleaning isn’t enough. If your keyboard is very expensive, heavily soiled, or you’re worried about damage, consider professional cleaning. Professionals:
- Fully disassemble the keyboard
- Use ultrasonic cleaners for keycaps
- Re-lubricate switches (for mechanical keyboards)
- Test each key for function
Professional cleaning is more thorough but can be costly. It’s usually only needed for high-end or heavily used keyboards.
Environmental Impact: Cleaning Products And E-waste
Using safe cleaning products is important for both your health and the environment. Avoid harsh chemicals that can damage plastic. When a keyboard becomes too dirty or broken to repair, recycle it properly—many electronics stores offer e-waste recycling.
If you regularly clean and maintain your keyboard, you’ll reduce the need for early replacement, which helps the environment.
Quick Reference Guide: Cleaning Frequency And Methods
Here’s a handy guide to cleaning frequency by keyboard type and use:
| Keyboard Type | Light Use | Heavy Use | Spill Response |
|---|---|---|---|
| Mechanical | Every 2-3 months | Monthly | Immediate deep clean |
| Laptop | Every 3 months | Monthly | Immediate power off and air dry |
| Membrane/Desktop | Every 2-3 months | Monthly | Immediate deep clean |
Non-obvious Insights Most Beginners Miss
- Keycap orientation matters: Many keycaps have tiny notches or shapes to fit only one way. Placing them upside-down or in the wrong spot can cause sticking.
- Compressed air can cause condensation: Hold the can upright and use short bursts. Spraying too long or tilting the can may release liquid propellant, which can damage electronics.
- Some keyboard warranties are voided if you remove keycaps: Always check the manufacturer’s policy before deep cleaning.
- Regular hand washing reduces cleaning needs: Clean hands transfer less oil and debris to the keyboard.
- Pet hair is a hidden enemy: It can wrap around switches and cause keys to stop working over time.
Frequently Asked Questions
How Do I Clean Under My Keyboard If I Can’t Remove The Keycaps?
If the keycaps can’t be removed (such as on some laptops or chiclet keyboards), use compressed air and a soft brush to loosen and blow out debris. Sticky notes or tape can help pick up hair and dust. Avoid using liquids, as they can seep under the keys and cause damage.
Credit: www.cnet.com
Is It Safe To Wash Keycaps With Soap And Water?
Yes, for most mechanical keyboard keycaps, gentle washing with mild soap and warm water is safe. Always dry them completely before replacing. Never wash the entire keyboard or any electronic parts with water.
What Should I Do If A Key Is Still Sticky After Cleaning?
If a key remains sticky, remove the keycap again and check for hidden debris. Clean the switch area with isopropyl alcohol using a cotton swab. If the problem continues, there may be damage to the switch, which might require professional repair.
Can I Use A Hairdryer To Dry My Keyboard After Cleaning?
It’s not recommended. Hairdryers can blow dust deeper inside and may overheat delicate parts. It’s safer to let keycaps and keyboards air-dry in a warm, dry place for at least 24 hours before reassembly.
How Can I Prevent My Keyboard From Getting Dirty So Quickly?
Avoid eating over your keyboard, wash your hands before use, and consider a keyboard cover. Clean your workspace regularly. These habits can dramatically reduce how often you need to clean under your keyboard.
Cleaning under your keyboard may take a little effort, but the benefits are clear: better performance, hygiene, and a longer lifespan for your device. With the right tools and techniques, you’ll keep your keyboard in top shape for years to come.
Related Office Guides
Continue with these related workspace guides:
