
Keeping your keyboard clean is not just about looks—it’s about performance, comfort, and even your health. The keycaps on your mechanical keyboard or laptop collect dust, oil, crumbs, and bacteria over time. If you ignore them, typing can feel sticky, your keyboard may look dirty, and some keys can even stop working well. Many people clean only the surface, missing the hidden dirt under the keys. This guide will walk you through every step of keycap cleaning, from basic daily care to deep cleaning, so your keyboard always feels fresh and works at its best.
Why Keycap Cleaning Is Important
Many users underestimate how much dirt and bacteria gather on their keyboards. Research shows the average keyboard can contain more bacteria than a toilet seat. For people who eat or drink at their desks, or share keyboards with others, the risk is even higher.
But it’s not just about hygiene. Sticky or dirty keycaps can affect your typing accuracy and speed. Over time, dirt can even damage the key switches underneath, leading to costly repairs or replacements. Regular cleaning can help your keyboard last longer and keep your typing experience smooth.
Types Of Keycaps And Cleaning Needs
Not all keycaps are the same. The material and finish affect how they attract and hold dirt, and how you should clean them.
| Type of Keycap | Material | Common Problems | Cleaning Difficulty |
|---|---|---|---|
| ABS | Plastic | Shiny, oily look over time | Easy |
| PBT | Plastic | Less shine, more texture | Moderate |
| Double-shot | Two plastics | Dirt in legends (letters) | Moderate |
| Backlit | Transparent & opaque | Shows dirt more | Harder |
ABS keycaps are smooth and can become shiny with use. They pick up fingerprints and oil easily, so need more frequent cleaning. PBT keycaps have a rougher texture and resist oil, but dust can stick in the grooves. Double-shot and backlit keycaps can collect dirt in the transparent legends. Always check your keyboard’s manual if you’re unsure about the material.
Tools And Supplies You Need
Before you start, gather all the right tools. Using the wrong tool can scratch or damage your keycaps.
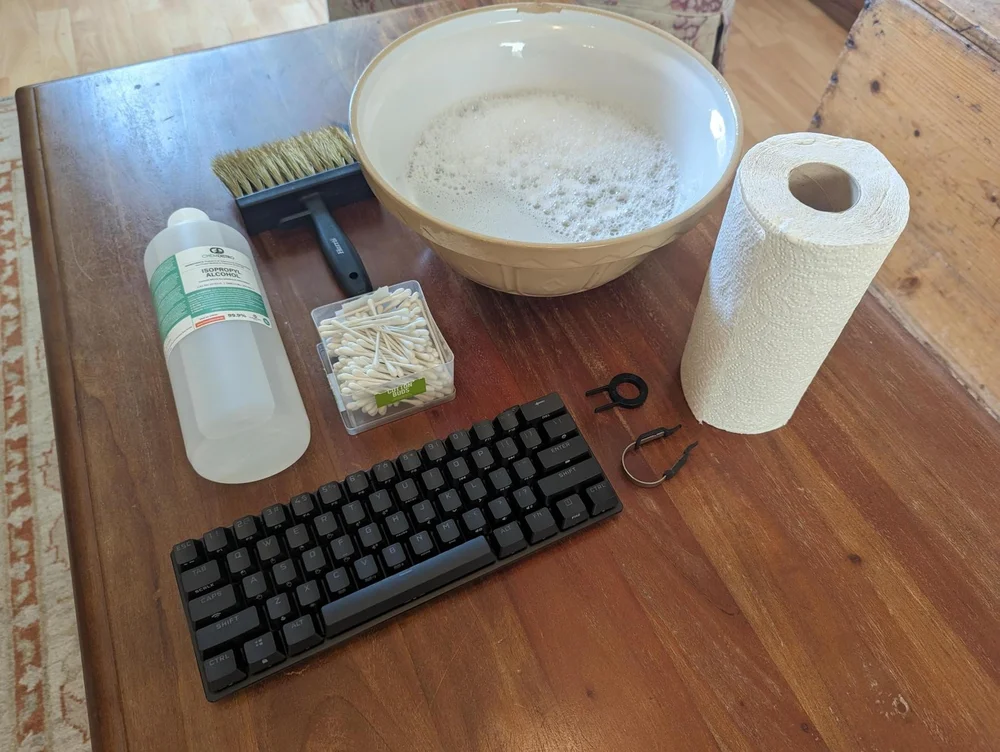
Essential tools for cleaning keycaps include:
- Keycap puller: Safely removes keycaps without damage.
- Soft brush: A small paintbrush or makeup brush works well.
- Microfiber cloth: For wiping and drying.
- Cotton swabs: For tight spaces.
- Mild dish soap: Non-abrasive, gentle on plastic.
- Small bowl: For soaking keycaps.
- Compressed air: Blows away loose dirt.
- Toothpick or soft stick: For cleaning crevices.
Optional, but helpful:
- Isopropyl alcohol (70% or less): For stubborn stains.
- Disinfectant wipes: For killing germs.
Avoid harsh chemicals or rough sponges. They can scratch or fade your keycaps.
Basic Daily And Weekly Cleaning
You don’t need to deep clean your keyboard every week. With some simple habits, you can keep your keycaps looking good and feeling smooth.
- Turn off and unplug your keyboard. This keeps you safe and prevents accidental keystrokes.
- Hold the keyboard upside down and gently shake it. This removes loose crumbs and dust.
- Use compressed air to blow out particles between the keys.
- Brush the keycaps with a soft brush. Move in one direction to push dirt out.
- Wipe with a microfiber cloth slightly dampened with water. Never let liquid drip into the keyboard.
For laptop users, be extra gentle. Laptops have thinner keycaps and more delicate switches. Never use too much force.
Doing this once a week prevents heavy buildup and makes deep cleaning easier.
Deep Cleaning: Removing And Washing Keycaps
Every few months, or if your keys feel sticky, it’s time for a deep clean. This means removing the keycaps and washing them. Here’s how:
Preparation
- Take a photo of your keyboard layout. This helps you put everything back correctly.
- Make sure you have enough time. Deep cleaning takes about 1–2 hours, plus drying time.
Removing The Keycaps
- Use a keycap puller. Slide it under the keycap, gently pull straight up.
- For large keys (Spacebar, Enter), pull gently from both sides. Some large keys have stabilizer bars—be careful not to bend or break them.
- Put the keycaps in a bowl or container.
Washing The Keycaps
- Fill a bowl with warm water and a few drops of mild dish soap.
- Soak the keycaps for 30–60 minutes.
- Use a soft brush or toothbrush to scrub each keycap. Focus on corners and inside the letters.
- Rinse with clean water to remove all soap.
Drying The Keycaps
- Shake off excess water.
- Place the keycaps on a towel, letter side down.
- Let them air dry for at least 8 hours, or overnight. Never use a hair dryer or heat—they can warp plastic.
Cleaning The Keyboard Body
While the keycaps are drying, clean the keyboard base:
- Use compressed air to blow out dust.
- Wipe the surface with a slightly damp microfiber cloth.
- Use cotton swabs for tight spaces.
Reassembling The Keyboard
- Make sure every keycap is completely dry.
- Use your photo to put each keycap back in the correct spot.
- Press down gently but firmly.
Special Cleaning For Mechanical, Laptop, And Gaming Keyboards
Each keyboard type needs a slightly different approach.
Mechanical Keyboards
Mechanical keyboards have taller keycaps and more dirt traps. They are easy to disassemble, but be careful with stabilizers and switch stems. Never force a keycap off. If you feel resistance, check for a stabilizer wire or consult your keyboard manual.
Laptop Keyboards
Laptop keycaps are fragile. Most are not designed for removal, especially on ultra-thin laptops. If you must remove a keycap, do so very gently and consult the laptop’s repair guide. It’s safer to clean on the keyboard, using a brush and microfiber cloth.
Gaming Keyboards
Gaming keyboards often have RGB backlighting and special coatings. Avoid soaking these keycaps if you’re unsure about their waterproof rating. Use damp cloths and avoid getting moisture near LEDs or circuitry.
Credit: kineticlabs.com
Removing Stubborn Stains And Odors
If your keycaps have stains from coffee, soda, or food, you may need extra cleaning steps.
- Isopropyl alcohol (70% or less) can remove tough stains. Dampen a cotton swab and rub gently—never pour alcohol directly.
- For sticky or greasy keys, mix a little baking soda with water into a paste. Rub the paste with a cloth, then rinse well.
- For odors, soak the keycaps in a water and vinegar mix (1 part vinegar to 3 parts water) for 10 minutes. Rinse thoroughly.
Always test any cleaner on one keycap first to check for fading or damage.
Cleaning Artisan, Custom, And Specialty Keycaps
Custom or artisan keycaps can be expensive and made from resin, metal, or even wood. These need special care.
- Never soak metal keycaps—they may rust.
- For resin or painted keycaps, use only a dry microfiber cloth.
- For wood keycaps, wipe gently with a slightly damp cloth. Do not soak.
If you have 3D-printed keycaps, avoid hot water which can warp the shape.
How Often Should You Clean Keycaps?
The right cleaning frequency depends on how and where you use your keyboard.
| User Type | Recommended Cleaning | Deep Clean Frequency |
|---|---|---|
| Office Worker | Weekly wipe | Every 2–3 months |
| Gamer | After long sessions | Monthly |
| Shared Keyboard | Daily disinfect | Every 1–2 months |
| Home User | Weekly or as needed | Every 3–6 months |
If you eat at your desk, clean more often. If you share your keyboard, disinfect daily.
Common Mistakes In Keycap Cleaning
Many people make simple errors that can damage their keycaps or keyboard.
- Using too much water: Excess moisture can get inside the keyboard and cause short circuits.
- Using harsh chemicals: Bleach, ammonia, or rough cleaners can fade legends and crack plastic.
- Not letting keycaps dry fully: Even a little moisture can harm electronic parts.
- Forcing keycaps: Pulling too hard can break stems or stabilizers.
- Ignoring stabilizer bars: Large keys often have metal bars. If you don’t reinstall them properly, the keys won’t feel right.
Avoid these mistakes for longer-lasting, better-feeling keycaps.

Credit: www.youtube.com
Advanced Tips For Enthusiasts
If you want your keyboard to feel truly like new, or you’re a collector, consider these advanced tips.
- Ultrasonic cleaners: These use sound waves to remove dirt, even in tiny crevices. Useful for old or heavily-used keycaps.
- Keycap painting or restoration: If legends fade, you can repaint with model paint and a fine brush.
- Protective coatings: Apply a thin layer of keyboard-safe wax to PBT keycaps to resist oil.
- Custom keycap sets: Keep a spare set. Swap them out when you clean the originals.
These steps are not needed for most users, but they can add value for enthusiasts.
Keycap Cleaning For Different Environments
Where you use your keyboard affects how you clean it.
Office And Shared Workspaces
- Wipe with disinfectant daily.
- Avoid sharing without cleaning.
- Use keyboard covers between uses.
Home Desks
- Regular dusting reduces buildup.
- If you have pets, watch for hair under the keys.
Schools And Libraries
- Use hand sanitizer before typing.
- Ask to clean shared keyboards before use.
Being aware of your environment helps you set the right cleaning habits.
Benefits Of Regular Keycap Cleaning
There’s more to cleaning than just appearances.
- Health: Fewer germs and allergens.
- Performance: Smooth, accurate typing and fewer stuck keys.
- Durability: Prevents permanent stains and switch damage.
- Value: Clean keyboards last longer and keep their resale value.
Most importantly, a clean keyboard is just more satisfying to use.
Environmental Impact And Safe Disposal
When cleaning, think about the environment.
- Use mild, biodegradable soap.
- Reuse cleaning cloths instead of disposable wipes.
- If you replace keycaps, recycle the old ones if possible.
Don’t pour soapy water or alcohol down the drain in large amounts.
When To Replace Keycaps Instead Of Cleaning
Even with the best care, keycaps can wear out. If you notice:
- Legends (letters) are faded or missing.
- Keycaps are cracked or broken.
- Stains won’t come out after several cleans.
It may be time for a new set. Replacing keycaps is a good way to refresh your keyboard and even improve comfort or appearance.
Real-world Examples And Data
A study by the University of Arizona found that office keyboards can have up to 400 times more bacteria than the average toilet seat. After cleaning, the bacteria level dropped by over 90%. Gamers report that clean keycaps improve their reaction time by a small but noticeable margin.
Enthusiasts on keyboard forums often share before-and-after photos, showing that even yellowed, 10-year-old keycaps can look new again after a proper deep clean.
If you’re curious about more cleaning statistics and methods, the Wikipedia page on keyboard cleaning offers further reading.
Credit: www.corsair.com
Frequently Asked Questions
How Can I Clean Keycaps Without Removing Them?
You can use a soft brush or compressed air to remove dust and crumbs. Wipe the tops with a microfiber cloth dampened with water or gentle cleaner. For sticky spots, use a cotton swab. Just be careful not to let water drip between the keys.
What Should I Do If I Lose A Keycap During Cleaning?
Don’t panic. Many keyboard makers sell replacement keycaps. You can also buy single keycaps online, or use a spare from an old keyboard. Take a photo before cleaning to help you identify missing keys.
Is It Safe To Put Keycaps In A Dishwasher?
It’s not recommended. The heat can warp plastic, and strong detergents can fade legends. Hand washing in a mild soap solution is safer and just as effective.
How Do I Clean Backlit Or Rgb Keycaps?
Clean with a damp microfiber cloth and avoid soaking. Water can get into the transparent parts and damage the backlight. Use a soft brush for dust and gentle cleaners for stains.
Can I Use Alcohol Wipes To Disinfect Keycaps?
Yes, but use wipes with 70% or less isopropyl alcohol. Wipe each keycap gently and avoid excess moisture. Let the keyboard dry for a few minutes before use.
A clean keyboard makes a surprising difference in daily comfort and productivity. With the right tools and habits, your keycaps will look sharp, feel smooth, and last for years. Whether you’re a gamer, writer, or casual user, regular keycap cleaning is a simple way to upgrade your typing experience.