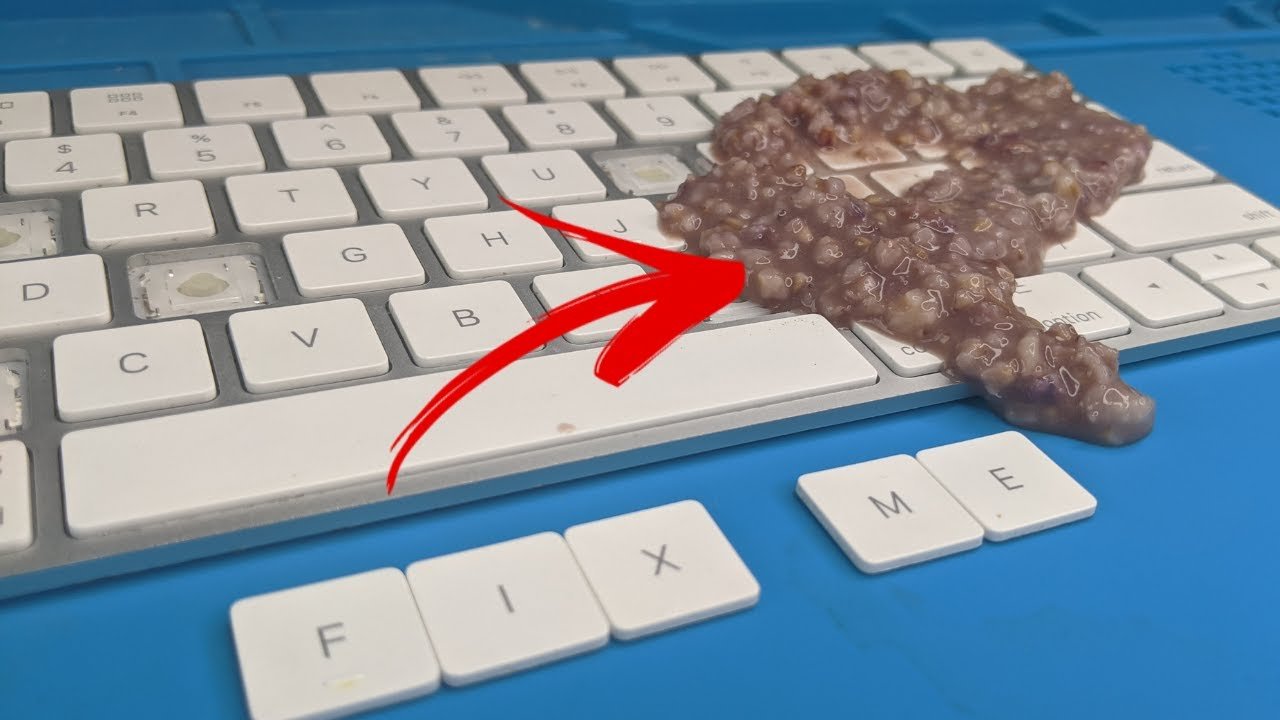
Keeping your keyboard clean is not just about looks—it’s also about health and performance. Over time, dust, crumbs, and oil from your fingers build up between and under the keys. This can lead to sticky keys, typing errors, and even spread germs. Many people clean the surface but forget the most important part: the keys themselves. If you have ever wondered how to clean keyboard keys safely and effectively, you’re in the right place. Whether you use a laptop or a desktop keyboard, you’ll find practical tips here that can extend your device’s life and make every keystroke feel smooth and fresh.
Why Keyboard Keys Need Regular Cleaning
A keyboard is one of the most-touched surfaces in your home or office. Research shows that keyboards can have more bacteria than a toilet seat, especially if you eat at your desk or share your device with others. Dirt and oils from your skin get trapped under and around the keys, creating a perfect place for germs to grow.
Besides hygiene, dirty keys can cause performance issues. Dust and debris can block key switches, making them hard to press or causing them to stick.
If you type for many hours each day, keeping your keyboard clean isn’t just a good habit—it’s a must for your health and productivity.
What You Need Before Cleaning
Before you start, gather all the necessary tools. Using the right supplies makes cleaning more effective and helps prevent damage.
Here’s what you should have:
- Soft brush (e.g., a small paintbrush or makeup brush)
- Compressed air can
- Isopropyl alcohol (at least 70%)
- Cotton swabs
- Microfiber cloth
- Small bowl of warm, soapy water
- Keycap puller (for mechanical keyboards)
- Toothpick or soft wooden stick
- Paper towels or clean towels
Never use bleach, strong chemicals, or very wet cloths. These can harm your keyboard’s surface or the electronics inside.
Basic Cleaning: Surface And Between The Keys
If you’re short on time or want a quick refresh, start with surface cleaning. This method is safe for both laptop and desktop keyboards.
- Turn off and unplug your keyboard or laptop. If you can, remove the battery.
- Flip the keyboard upside down and gently tap it. This helps remove loose crumbs and dust.
- Use a soft brush to sweep between the keys. Move the brush in different directions to reach hidden spots.
- Spray a compressed air can between the keys. Hold the can upright and use short bursts to avoid moisture buildup.
- Wipe the keytops with a microfiber cloth slightly dampened with water. Don’t let water drip into the keyboard.
This quick clean helps stop buildup and is safe to do weekly.
Deep Cleaning: Removing And Washing Keyboard Keys
Sometimes, a simple wipe isn’t enough. If your keys feel sticky or look dirty, a deep clean is needed. This process is especially important for people who eat at their desks or use their keyboard daily for work or gaming.
When Should You Remove Keys?
- Mechanical keyboards: Most keys are easy to remove and reattach.
- Laptop keyboards: Keys are delicate and harder to reattach. Only remove them if necessary, and check your laptop’s manual first.
- Membrane keyboards: Some keys can be taken off, but be gentle.
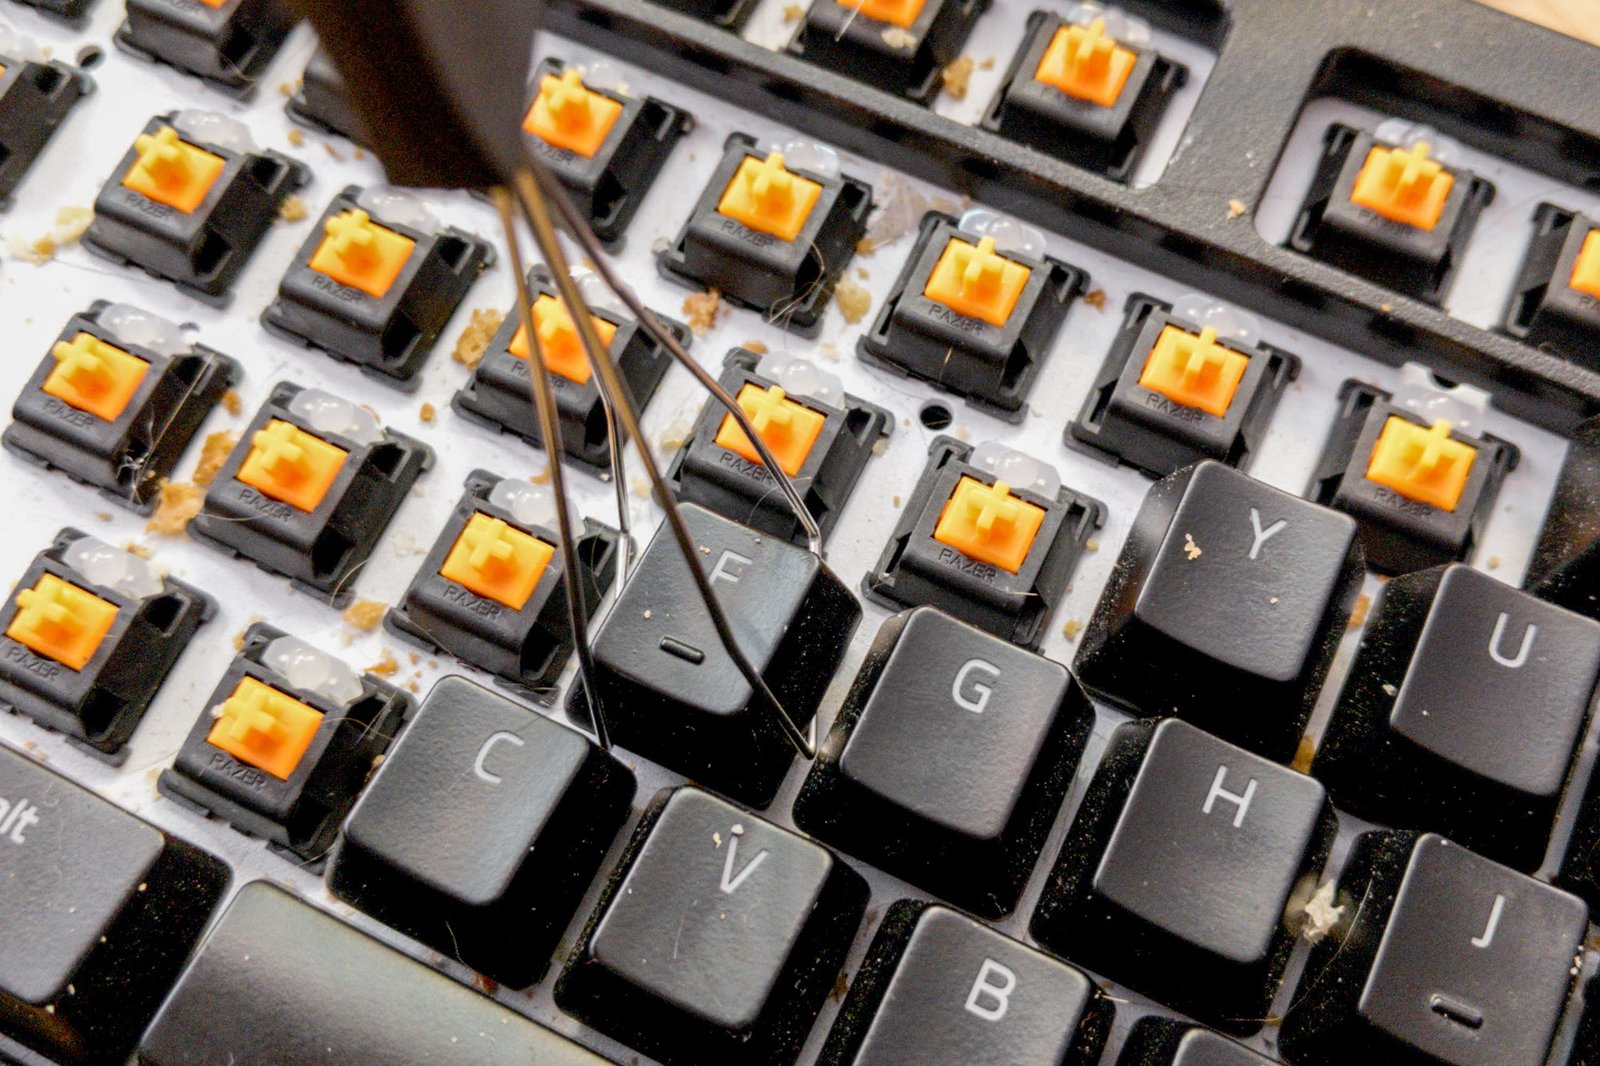
How To Remove Keyboard Keys
- Take a clear photo of your keyboard layout. This helps you put keys back in the right place.
- Use a keycap puller or gently lift with a flat tool (like a plastic card). Never use metal tools, which can scratch or bend keys.
- Remove only a few keys at a time if you’re new to this.
Washing The Keys
- Place the keys in a bowl of warm, soapy water.
- Let them soak for 10–15 minutes.
- Use a toothbrush to scrub away sticky dirt or stains.
- Rinse with clean water and lay them on a towel to dry completely—at least 4–6 hours, or overnight.
Cleaning Under The Keys
- With the keys off, use a soft brush or compressed air to remove debris.
- Clean sticky areas with a cotton swab dipped in isopropyl alcohol.
- Never pour water or alcohol directly onto the keyboard.
Reattaching The Keys
- Make sure each key is dry.
- Snap each key back into place, using your photo as a guide.
- Test each key to check that it works and feels right.
Credit: www.youtube.com
Special Tips For Different Keyboard Types
Keyboards are not all the same. Here are some tips based on your device:
Laptop Keyboards
- Laptop keys are thin and fragile. Removing them can break the clips.
- For most laptops, stick to surface cleaning.
- If you must remove a key, check the manufacturer’s website or manual for instructions.
Mechanical Keyboards
- Designed to be user-serviceable. Most keys can be removed and cleaned.
- Some mechanical keyboards are water-resistant—check your manual before using liquids.
Wireless Keyboards
- Remove batteries before cleaning.
- Avoid letting any moisture get inside the battery compartment.
Gaming Keyboards
- Keys get sticky faster due to sweat and long hours of use.
- Clean them more often, and consider using a keyboard cover.
Cleaning Sticky Or Stained Keys
If a key is sticky or has a stubborn stain, you need extra steps.
- Use a cotton swab with a little isopropyl alcohol.
- Gently rub the sticky area—do not flood the key.
- If the key sticks due to a spill (like soda or juice), remove the keycap and clean underneath.
A non-obvious tip: For food spills, use a toothpick to remove dried bits before wiping. Many beginners miss this and end up smearing the dirt instead.
How Often Should You Clean Keyboard Keys?
The answer depends on your usage:
- Every week: Quick surface wipe if you use your keyboard daily.
- Every month: Deep clean if you eat at your desk or notice sticky keys.
- Every 3–6 months: Remove and wash keys if you use your keyboard for gaming, programming, or work.
If you share your keyboard or work in a public space, clean more often.
Keyboard Cleaning Mistakes To Avoid
Many people make cleaning mistakes that can harm their device. Here are the most common:
- Using too much liquid: This can seep under the keys and damage electronics.
- Skipping a layout photo: It’s easy to forget where keys go, especially on non-English layouts.
- Using metal tools: These scratch and bend keycaps.
- Not waiting for keys to dry: Moisture can cause short circuits or mold.
- Forcing keys back on: Each key has a specific direction and clip—forcing can break them.

Credit: www.cnet.com
Comparing Cleaning Methods
Here is a quick comparison of common keyboard cleaning methods:
| Cleaning Method | Best For | Time Needed | Risk Level |
|---|---|---|---|
| Surface Wipe | Quick clean, any keyboard | 5 min | Very Low |
| Compressed Air | Removing dust | 2 min | Low |
| Key Removal & Wash | Deep clean, mechanical keyboards | 45–60 min | Medium |
| Professional Cleaning | Sticky spills, complex keyboards | 1–2 hours | Low |
Diy Cleaning Tools Vs. Store-bought Kits
Which tools should you use? Here’s how DIY tools compare to store-bought cleaning kits:
| Tool Type | Cost | Effectiveness | Best Use |
|---|---|---|---|
| DIY (brush, cloth, alcohol) | Low | Good | Regular cleaning |
| Cleaning Gel | Medium | Fair | Quick dust pickup |
| Compressed Air | Medium | Excellent | Dust between keys |
| Store-Bought Kit | High | Excellent | Full cleaning |
How To Keep Your Keyboard Cleaner Longer
After a deep clean, you want to keep your keyboard clean as long as possible. Here are some tips:
- Wash your hands before typing.
- Avoid eating at your desk. Crumbs and grease are the main causes of dirty keys.
- Use a keyboard cover. These are cheap and keep out dust and spills.
- Store your keyboard in a case if you move it often.
- Clean your workspace regularly to stop dust and hair from building up.
A tip that many overlook: Use a small, handheld vacuum once a week. This pulls out crumbs and hairs before they get stuck under keys.
Is Professional Cleaning Worth It?
If your keyboard has a major spill or sticky mess you cannot fix, a professional cleaning service can help. They have the tools to safely take apart and clean every part. This is usually only needed for expensive or hard-to-replace keyboards.
Health Benefits Of Clean Keyboard Keys
Keeping your keyboard clean does more than just improve looks. It can:
- Lower your risk of germs and illness
- Make typing more comfortable and accurate
- Extend your keyboard’s life
- Improve your focus by reducing distractions from dirt
A clean keyboard is a small change that can improve both your work and your well-being.
Where To Learn More
For more details on safe cleaning of electronics, visit the Wikipedia page on keyboard cleaning.
Credit: www.nytimes.com
Frequently Asked Questions
How Do I Clean Keyboard Keys Without Removing Them?
You can use a soft brush and compressed air to remove dust and crumbs. For sticky spots, wipe with a microfiber cloth dampened with a bit of isopropyl alcohol. This method is safe for most keyboards and avoids the risk of breaking delicate keys.
Is It Safe To Wash Keyboard Keys With Water?
Yes, you can wash plastic keycaps in warm, soapy water. Make sure to dry them fully—at least 4–6 hours—before reattaching. Never soak the whole keyboard, and keep water away from the electronics.
What Should I Do If I Spill Something On My Keyboard?
Immediately unplug the keyboard or turn off your laptop. Flip it upside down to drain liquid. Wipe up what you can, and let it dry for 24 hours. For sticky spills, remove and clean the affected keys. If keys still stick, consider professional cleaning.
How Often Should I Deep Clean My Keyboard Keys?
Most people should deep clean every 3–6 months. If you use your keyboard heavily or eat at your desk, deep clean every month. Regular quick wipes can help you go longer between deep cleans.
Can I Use Household Cleaners To Clean Keyboard Keys?
Avoid strong chemicals like bleach or window cleaners. Use isopropyl alcohol (at least 70%) for sticky or greasy spots. Always apply cleaners to a cloth or swab, not directly on the keyboard, to avoid liquid damage.
Keeping your keyboard clean might feel like a small task, but it brings big benefits. With the right tools, simple habits, and a little care, you can keep your keys working perfectly for years to come.
Related Office Guides
Continue with these related workspace guides:
