
Cleaning sticky keyboard keys can feel overwhelming, especially if you use your computer daily for work, study, or fun. One spilled drink or a few crumbs can turn your smooth keyboard into a sticky mess. It’s tempting to ignore the problem, but sticky keys can slow down your typing, cause errors, and even damage your device over time.
Luckily, you don’t have to be a tech expert to clean your keyboard effectively. With the right steps, a bit of patience, and simple tools, you can restore your keys to their original smoothness.
Many people think cleaning sticky keyboard keys is risky or complicated. In reality, it’s a straightforward task once you know what to do—and what NOT to do. This guide will walk you through everything, from basic cleaning to deep cleaning, and even how to handle different types of keyboards.
You’ll also learn how to avoid common mistakes that can ruin your keyboard. If you’ve ever wondered whether you can use alcohol, which tools are safest, or how to remove and replace keys, you’ll find clear answers here. Let’s make your keyboard feel like new again.
Why Keyboard Keys Get Sticky
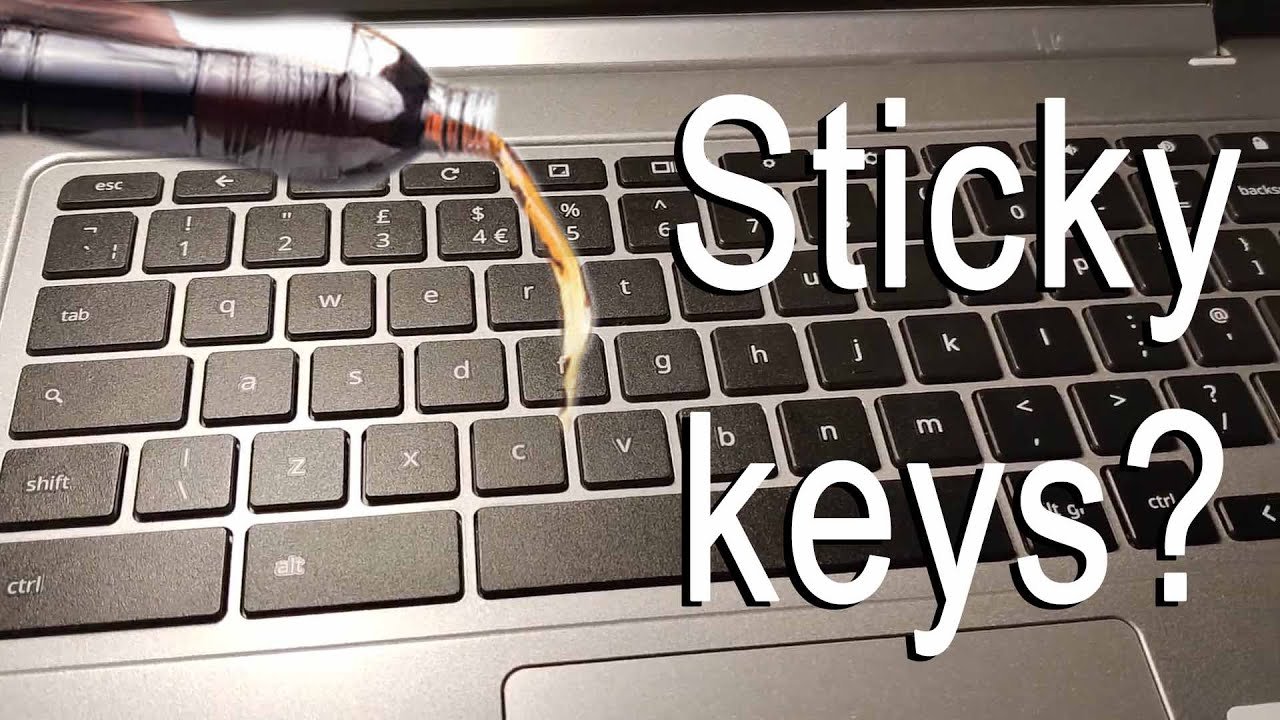
Understanding why keys become sticky helps prevent future messes. Most sticky keys come from spilled drinks, food crumbs, or residue from fingers. Sugary liquids like soda or coffee with sugar are the worst offenders. Even if you clean up the spill quickly, the residue dries underneath, making keys stick or refuse to press properly.
Another reason is dust and oils. Over time, natural oils from your fingers build up on the keys. Combined with dust, this creates a sticky film. If you often eat near your computer, crumbs can fall between the keys and mix with the oils, making the problem worse.
Knowing the cause helps you choose the best cleaning method and prevents repeat problems. For example, if your issue is mainly from dust and oils, a regular surface clean might be enough. But if there’s dried soda or juice under the keys, you’ll need a deep clean.
Tools And Materials You Need
You don’t need expensive products to clean sticky keyboard keys. In fact, most items are probably already in your home. Here’s what you should gather before starting:
- Soft microfiber cloths: These wipe surfaces without scratching.
- Cotton swabs: Great for cleaning between keys.
- Isopropyl alcohol (70% or higher): Safe for electronics, dissolves sticky residue.
- Small bowl or cup: For holding cleaning solution.
- Toothpick or soft brush: Removes crumbs and debris from tight spaces.
- Compressed air can: Blows out loose dust and dirt.
- Keycap puller or flat tool: Useful for removing keycaps (not for all keyboards).
- Mild dish soap: For deep cleaning keycaps.
- Tweezers: Helps pick out stubborn bits.
- Paper towels or lint-free cloth: For drying parts.
- Optional: Small screwdriver: For some mechanical keyboards.
Important note: Never use bleach, window cleaner, or strong solvents. These can damage your keyboard.
Credit: www.youtube.com
Basic Cleaning For Sticky Keys
If your keyboard feels sticky but there’s no major spill, start with a basic clean. This method is safe for almost all keyboards and takes just a few minutes.
Step-by-step Basic Cleaning
- Unplug or turn off your keyboard. If it’s a laptop, shut it down and unplug the charger.
- Flip the keyboard upside down. Gently shake to remove loose debris.
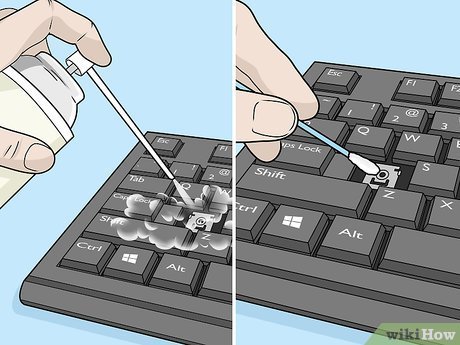
- Use compressed air. Blow out dust and crumbs from between the keys. Hold the can upright and spray in short bursts.
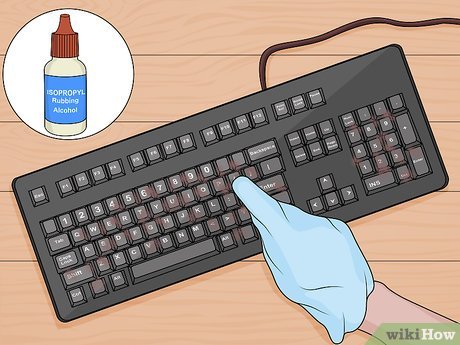
- Wipe the surface. Dampen a microfiber cloth with a little isopropyl alcohol. Wipe the tops of the keys and the area around them.
- Clean between keys. Dip a cotton swab in alcohol, squeeze out excess, and run it along the sides of each sticky key. This helps dissolve oils and mild stickiness.
After this basic clean, test your keys. If they still stick, you may need a deeper clean.
Deep Cleaning: Removing And Cleaning Keycaps
For serious stickiness, especially after spills, you need to remove the keycaps and clean underneath. This method works best for mechanical and desktop keyboards, but some laptop keyboards allow limited removal.
How To Remove Keycaps Safely
Not all keyboards are built the same. Mechanical keyboards usually have removable keycaps, while laptop and membrane keyboards can be more sensitive. Always check your keyboard’s manual before removing keys.
- Check your keyboard type. Mechanical keyboards: Keycaps pop off easily. Laptop keyboards: only some keys (like spacebar) are removable.
- Take a photo. Before removing, snap a picture of your keyboard layout. This helps you put keys back in the right place.
- Use a keycap puller or flat tool. Place it under the edge of a keycap and gently lift until it pops off. Start with a corner key like Shift or Ctrl.
- Work slowly. Never force a keycap; if it doesn’t come off easily, stop.
Cleaning Removed Keycaps
Once removed, keycaps can be cleaned more thoroughly.
- Soak keycaps. Place them in a bowl with warm water and a drop of mild dish soap. Let them soak for 10-15 minutes.
- Scrub gently. Use a soft brush or toothbrush to clean sticky residue.
- Rinse and dry. Rinse keycaps with clean water and dry them on a paper towel. Make sure they are completely dry before reattaching.
Cleaning The Keyboard Base
With keycaps off, you can clean the sticky surface underneath.
- Brush away debris. Use a soft brush or compressed air to remove crumbs.
- Spot clean sticky areas. Dip a cotton swab in isopropyl alcohol and clean the sticky spots.
- Wipe the surface. Use a slightly damp (not wet) microfiber cloth with alcohol.
Tip: Never pour liquid directly onto the keyboard.
Reattaching Keycaps
Once everything is dry, use your photo to put the keycaps back in place. Press down gently until they snap in.
Cleaning Sticky Laptop Keyboard Keys
Laptop keyboards are trickier because the keys are thinner and more delicate. Removing keycaps isn’t always possible. Still, you can clean sticky keys with care.
Steps For Laptop Key Cleaning
- Power off and unplug. Remove the battery if possible.
- Flip and shake. Gently shake the laptop upside down to dislodge debris.
- Compressed air. Spray between the keys to remove dust.
- Surface clean. Dampen a microfiber cloth with isopropyl alcohol and wipe the key surfaces.
- Clean edges. Use a barely damp cotton swab to clean around the sticky keys.
If the key remains sticky, check if your model allows you to gently pry off the keycap. Most laptop keys snap off with light pressure from a flat tool, but they can break easily. If you’re unsure, check the laptop manual or search online for your model.
Non-obvious insight: Many laptops have a small plastic scissor switch under the key. If this comes out, it’s hard to reinstall. Always lift gently and avoid twisting.
What To Do After A Spill
Spills are one of the main reasons for sticky keys. If you act quickly, you can prevent lasting damage.
Immediate Steps After A Spill
- Turn off and unplug. Immediately disconnect your keyboard or shut down your laptop.
- Flip device upside down. Let the liquid drain out.
- Wipe off excess. Use a paper towel to soak up as much liquid as possible.
- Remove keycaps if possible. Begin deep cleaning (see above).
- Let it dry. Leave the device in a dry area for 24-48 hours before turning it back on.
Types Of Liquids And Their Risks
Some drinks are worse than others. Here’s a quick comparison:
| Liquid Type | Sticky Residue | Damage Level | Special Note |
|---|---|---|---|
| Water | None | Low | Let dry fully |
| Coffee/Tea (no sugar) | Low | Medium | Wipe quickly |
| Soda/Juice | High | High | Deep clean required |
| Alcoholic Drinks | Medium | Medium | Clean thoroughly |
| Milk | Very High | Very High (smell, mold) | Professional cleaning may be needed |
Non-obvious insight: Even a small amount of sugary liquid can cause keys to stick days or weeks later as residue dries.
Cleaning Between Keys Without Removal
Not comfortable removing keycaps? You can still clean between them using a few tricks.
- Compressed air: Blows out dust and crumbs.
- Cotton swabs: Dipped in isopropyl alcohol, squeeze out excess, and run along sides of keys.
- Toothpick: Gently scrape sticky residue from the edges of keys.
- Cleaning gel: Keyboard cleaning gels can pick up dust and some sticky spots, but may not remove heavy residue.
Tip: Always power off and unplug before cleaning.
Cleaning Mechanical Vs. Membrane Keyboards
Different keyboards need different care. Here’s a side-by-side comparison:
| Keyboard Type | Keycap Removal | Cleaning Difficulty | Best Cleaning Method |
|---|---|---|---|
| Mechanical | Easy | Medium | Remove keycaps, deep clean |
| Membrane | Hard | High | Surface and edge clean only |
| Laptop | Very hard | Very high | Surface clean, careful edge cleaning |
Mechanical keyboards are the easiest to clean deeply. Membrane and laptop keyboards can be damaged if you try to remove the keys without checking the design first.
Safe Cleaning Solutions For Sticky Keys
The right cleaning solution matters. Some liquids are safe, while others can ruin your keyboard.
- Isopropyl alcohol (70% or higher): The safest for electronics. It evaporates quickly and cuts through sticky residue.
- Mild dish soap: Use only on removed keycaps, never directly on the keyboard.
- Distilled water: For rinsing keycaps.
- Pre-moistened electronics wipes: Convenient for surface cleaning.
Never use: Bleach, ammonia, or window cleaner. These can dissolve the markings on the keys and harm the plastic.
How To Prevent Sticky Keyboard Keys
Prevention saves time and money. Some simple habits make a big difference.
- Don’t eat or drink near your keyboard. This is the easiest way to avoid spills and crumbs.
- Wash your hands before typing. Reduces oil and dirt on keys.
- Clean your keyboard regularly. A quick wipe once a week prevents buildup.
- Use a keyboard cover. Especially helpful in homes with children or pets.
- Store your keyboard safely. If you move your laptop or keyboard, avoid tossing it in bags with loose items.
Non-obvious insight: Even with a keyboard cover, liquids can seep in from the edges. Remove and clean the cover often.
Credit: www.wikihow.com
When To Seek Professional Help
Sometimes, cleaning isn’t enough. If your keyboard remains sticky after deep cleaning, or if keys stop working, it’s time for expert help.
- Key won’t press or pops off: May need repair or replacement.
- Multiple keys stop responding: Likely electronic damage.
- Liquid damage: If milk, sugary drinks, or large spills occur, professional cleaning is best.
Most repair shops can clean or replace individual keys. For laptops, repairs are more complex and might involve replacing the whole keyboard unit.
Advanced Tips And Tricks
If you want to go beyond basic cleaning, here are some advanced tips:
- Use a hair dryer on cool setting to speed up drying after cleaning (never use heat).
- Keyboard vacuum cleaners are available online for regular dust removal.
- Label removed keycaps with sticky notes or use a keycap layout diagram if you remove many at once.
- Keep a “spare” keyboard if you rely on your computer for work. This way, you can clean one while using the other.
Non-obvious insight: Some mechanical keyboards allow full disassembly for a “bath” (removing the circuit board first), but this is only for advanced users.
Credit: www.wikihow.com
Common Mistakes To Avoid
Many people make simple mistakes that can damage their keyboards.
- Using too much liquid: Even alcohol can damage if it seeps inside.
- Not letting parts dry fully: Moisture can cause short circuits.
- Forcing keycaps off: Can break the mechanism, especially on laptops.
- Using rough cloths or brushes: Can scratch key markings.
- Skipping unplugging or turning off: Cleaning a powered device risks electric shock or permanent damage.
Always move slowly and gently during the cleaning process.
How Often Should You Clean Your Keyboard?
Cleaning frequency depends on usage:
- Daily users: Surface clean once a week, deep clean every 2-3 months.
- Occasional users: Deep clean every 6 months.
- After spills: Immediate cleaning is essential.
If you work in a dusty or shared space, clean more often. Studies show that keyboards can hold more bacteria than a toilet seat if not cleaned regularly. Regular cleaning keeps your workspace healthy and your keyboard working longer.
Frequently Asked Questions
How Do I Clean A Sticky Key Without Removing It?
Use a cotton swab dipped in isopropyl alcohol (squeeze out excess) and gently clean around the sticky key. Move the key up and down while cleaning to help the alcohol reach the sticky spot. Let it dry before use.
Can I Use Water To Clean My Keyboard?
Use water only on removed keycaps. Never pour water or use a wet cloth on the keyboard itself. Water can seep inside and damage the electronics. Always prefer isopropyl alcohol for the keyboard base.
What Should I Do If Keys Are Still Sticky After Cleaning?
If stickiness remains after surface cleaning, try removing the keycaps for a deeper clean. If you still can’t fix it, the sticky residue may be under the key or inside the switch. In that case, professional cleaning or replacing the key may be needed.
Are Cleaning Gels Safe For All Keyboards?
Cleaning gels are generally safe for surface dust and light dirt, but they can leave residue or even get stuck in some keyboard types. Avoid using gel on laptop or membrane keyboards. Always test on a small area first.
Where Can I Find More Information About Keyboard Maintenance?
For detailed guides and keyboard care tips, visit the Wikipedia Computer Keyboard page.
Cleaning sticky keyboard keys isn’t difficult if you follow the right steps. With regular care and quick action after spills, you can keep your keyboard smooth, comfortable, and long-lasting. Whether you’re using a high-end mechanical keyboard or a basic laptop, a clean keyboard makes typing faster and more enjoyable.
Don’t let sticky keys slow you down—give your keyboard the attention it deserves.