Many people use mechanical keyboards for work, gaming, or daily tasks. Over time, dust, hair, and crumbs can build up under the keycaps. This not only looks dirty but can also affect how well your keyboard works. Removing keycaps for cleaning is one of the best ways to keep your keyboard fresh and working smoothly.
While the idea might sound simple, there are some important steps and tips you should know before starting. If you do it wrong, you might damage your keyboard or lose a keycap. With the right guide and a bit of patience, anyone can do this safely and make their keyboard look and feel like new.
If you are a beginner, you might feel nervous about taking off keycaps. This is normal. Many people worry about breaking something or not being able to put the keys back. But with the right tools and a clear process, removing keycaps is safe and easy.
This guide will show you how to remove keycaps step by step, what tools you need, and how to clean both your keycaps and keyboard. You will also learn some useful tips and answers to common questions, so you can avoid mistakes and get the best results.
Why Clean Your Keyboard And Keycaps?
Keyboards are touched by our hands all day. Oil, sweat, food, and dust collect on and under the keys. Studies show that keyboards can have more bacteria than a toilet seat. Dirty keyboards can cause health issues, trigger allergies, and make typing uncomfortable.
Cleaning your keycaps regularly makes your keyboard last longer and keeps you healthy.
Some benefits of cleaning your keycaps include:
- Better typing feel and sound
- Less chance of sticky or unresponsive keys
- A fresh, clean look
- Lower risk of spreading germs
- Longer keyboard life
Most people do a quick wipe on the top of the keys, but this does not clean under the keycaps. Removing the caps lets you clean the hard-to-reach places where dust and crumbs hide.
Tools And Supplies You Need
Before you begin, gather the right tools. Having everything ready saves time and prevents mistakes.
- Keycap puller: This tool is designed to safely remove keycaps. Most mechanical keyboards come with one. If not, you can buy a wire keycap puller online. Do not use metal forks or knives, as they can damage your keys.
- Small bowl or container: To keep your keycaps together so you don’t lose any.
- Soft brush: A clean paintbrush or makeup brush works well for dusting the keyboard base.
- Compressed air can: Helps blow out dust from the keyboard.
- Mild dish soap: For soaking and cleaning keycaps.
- Microfiber cloth: For drying and wiping.
- Tweezers: Useful for pulling out hair or stubborn dirt.
- Cotton swabs: For detailed cleaning in tight spaces.
Optional but helpful:
- Isopropyl alcohol (70% or above): For deep cleaning.
- Toothpick: To remove sticky grime from crevices.
Some people try to use their fingers to pull off keycaps, but this can bend or break the switches. Using a proper keycap puller is always safer.
Types Of Keyboards: Mechanical Vs. Membrane
Not all keyboards are the same. Understanding your keyboard type is important before removing keycaps.
| Feature | Mechanical Keyboard | Membrane Keyboard |
|---|---|---|
| Keycap removal | Easy, designed for it | Harder, risk of damage |
| Switch type | Individual mechanical switches | Rubber dome under keys |
| Best cleaning method | Remove keycaps, deep clean | Surface clean only |
| Common in | Gaming, professional use | Office, budget keyboards |
Mechanical keyboards are easier to clean because their keycaps are designed to be removed. Membrane keyboards have a different structure. Removing their keycaps is possible, but it is riskier and not recommended unless you are experienced. If you have a mechanical keyboard, you are in luck—this guide is written mainly for you.
Step-by-step: How To Remove Keycaps Safely
Taking off keycaps is simple, but there are some steps you should always follow. Rushing or using force can break your keyboard.
1. Unplug The Keyboard
Always unplug your keyboard before cleaning. This prevents electrical damage and stops accidental key presses while you work.
2. Take A Photo Of Your Keyboard
Before removing any keycaps, use your phone to take a clear photo of your keyboard layout. This helps you remember where each key goes, especially if your keyboard has a non-standard layout.
3. Remove Large Keycaps First
Some keys, like the spacebar, enter, or shift, are bigger and may have stabilizers underneath. These stabilizers are small bars that keep large keys level when pressed.
- Start by gently rocking these keys side to side before pulling.
- Use the keycap puller and apply even pressure.
- For keys with stabilizers, lift one side slightly, then the other.
If you feel strong resistance, stop and check if there is a metal bar connected. Some stabilizers can pop out easily, while others might need a gentle wiggle. Forcing these can break the stabilizer or keycap.
4. Remove Regular Keycaps
Insert the keycap puller over the keycap. If you are using a wire puller, slide the wires on each side of the key.
- Pull straight up with gentle, even force.
- Do not twist or angle the keycap, as this can damage the switch stem.
- Place each removed keycap in your bowl or container.
Work row by row so you remember the order. Some people start from one corner and move across the keyboard for better organization.
5. Deal With Stubborn Keycaps
If a keycap will not come off easily, do not force it. Try wiggling the puller side to side gently. If it still resists, check for dirt or sticky residue that might be holding it in place. Sometimes, a few drops of isopropyl alcohol around the stem can loosen it.
6. Don’t Forget Special Keys
Some keyboards have special function keys or macro keys. These might have different shapes or sizes. Take extra care when removing these, and keep them in a separate section of your bowl.
7. Clean The Keycaps
Once all keycaps are off, you can clean them:
- Fill a bowl with warm water and a few drops of mild dish soap.
- Place the keycaps in the water and let them soak for 30-60 minutes.
- Use a soft brush or your fingers to scrub away dirt.
- Rinse the keycaps with clean water.
- Spread them on a towel to dry completely—usually at least 4-5 hours.
Never use hot water as it can warp plastic keycaps. Also, do not put keycaps in the dishwasher. High heat or strong detergents can damage their finish.
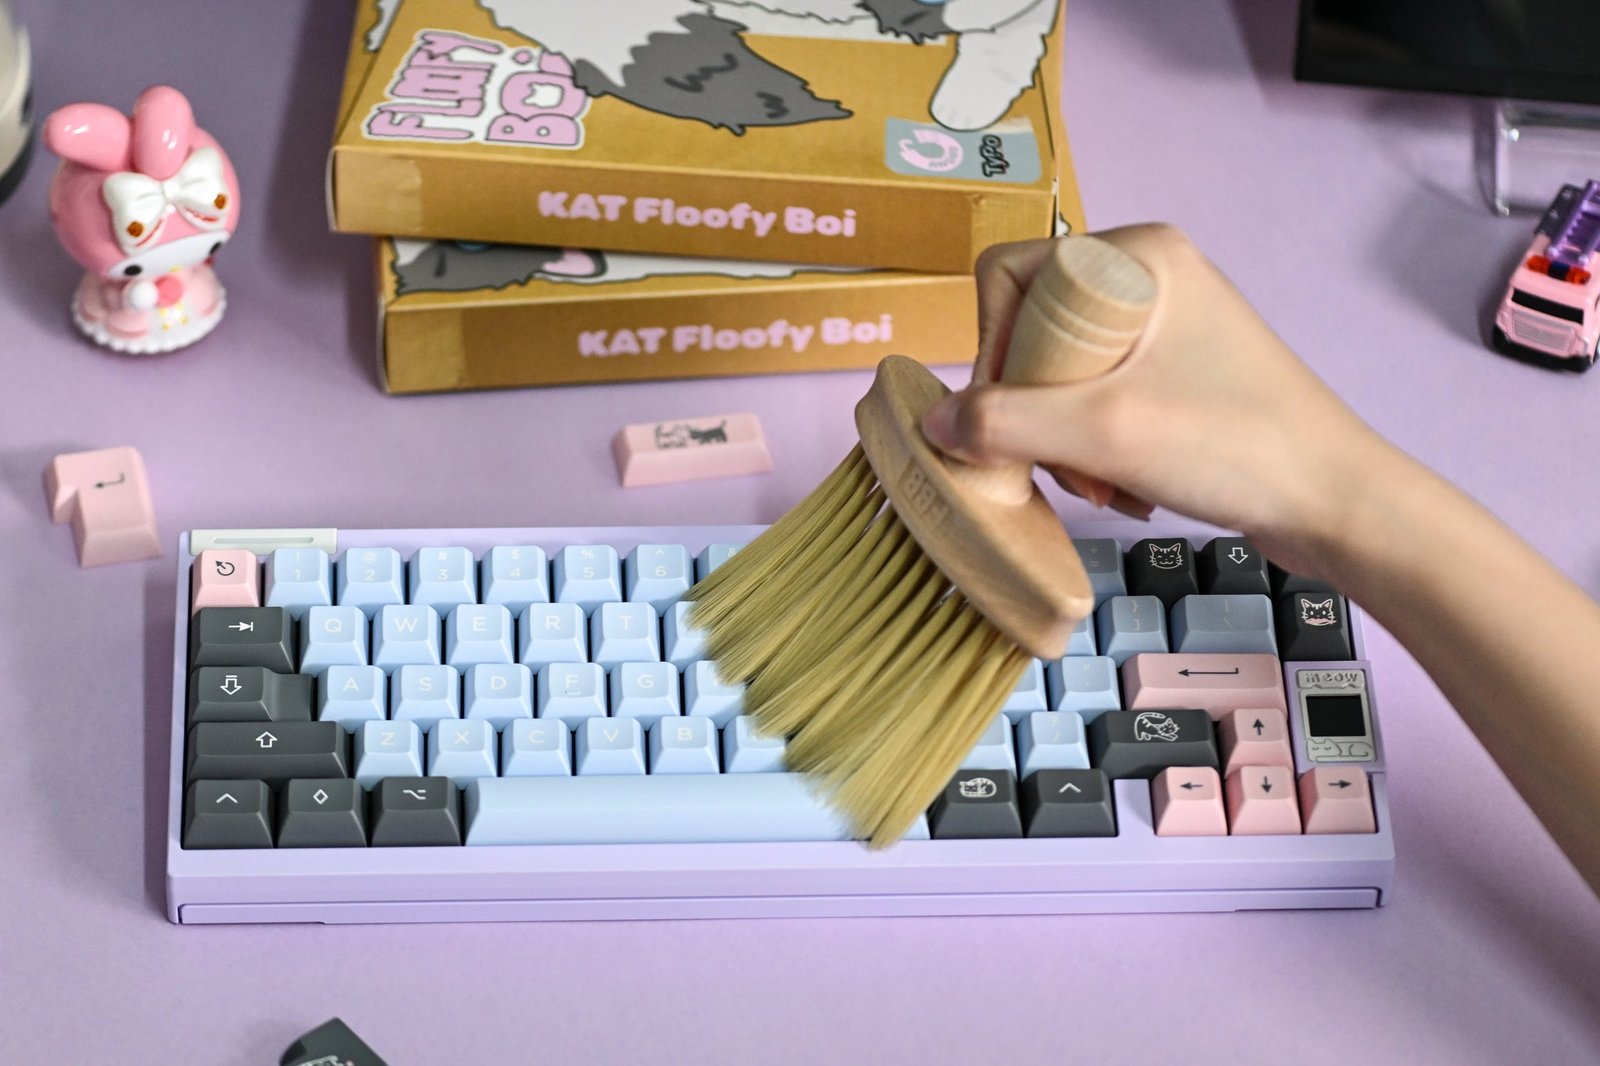
8. Clean The Keyboard Base
While the keycaps are drying, clean the keyboard base:
- Use a soft brush to sweep out dust and crumbs.
- Blow out loose dirt with a can of compressed air.
- For sticky spots, use a cotton swab dipped in isopropyl alcohol.
- Wipe the surface with a microfiber cloth.
Be gentle—do not let liquids get inside the switches. If you spill anything, let the keyboard dry fully before using it again.
9. Reinstall The Keycaps
After the keycaps are fully dry, use your reference photo to put them back. Place each keycap over its switch and press down gently. For large keys with stabilizers, make sure the stabilizer bar is lined up before pressing the key into place.
Take your time, especially with unusual keys. If a key feels loose or wobbly after reinstalling, remove it and check for dirt or misalignment.
Common Mistakes To Avoid
Many beginners make simple errors that can damage their keyboard or keycaps.
- Using too much force: Keycaps should come off with gentle pulling. Forcing them can break stems.
- Losing keycaps: Always use a bowl or container to keep removed keycaps together.
- Washing before checking for legends: Some keycaps have printed letters that can wear off. Test with a small area before soaking.
- Not letting keycaps dry fully: Even a bit of water can damage switches. Wait at least 4-5 hours, or overnight.
- Mixing up keycap order: Take a photo before starting or lay keycaps out in order as you remove them.
Some mechanical keyboards have different row heights. Mixing up the rows can make typing uncomfortable and uneven.
Keycap Materials And Cleaning Differences
Keycaps can be made from different plastics, and each reacts differently to cleaning:
| Material | Common Uses | Cleaning Notes |
|---|---|---|
| ABS plastic | Most standard keycaps | OK to soak, but legends may fade if printed |
| PBT plastic | Premium and gaming keyboards | More durable, resists shine, safe to soak |
| POM plastic | High-end, specialty keycaps | Very durable, do not use harsh chemicals |
ABS keycaps are the most common but can become shiny and lose their texture over time. PBT keycaps are more resistant to wear and less likely to fade. If your keycaps have painted or printed legends, test cleaning on one keycap first to make sure the letters don’t wash away.
Deep Cleaning Tips For Heavily Soiled Keyboards
If your keyboard is very dirty or sticky, you may need a deeper cleaning:
- Use isopropyl alcohol (at least 70%) for sticky spots. Apply with a cotton swab, but do not let it drip into the switches.
- For old or yellowed keycaps, add a small amount of baking soda to the cleaning water. This can help lift stains.
- If you spill a sugary drink on your keyboard, remove all keycaps and clean the base and keycaps thoroughly.
For very old or valuable keyboards, check with the manufacturer for special cleaning advice. Some vintage keyboards have delicate parts.
How Often Should You Remove Keycaps For Cleaning?
The right cleaning schedule depends on how and where you use your keyboard:
- Daily use, no food nearby: Remove keycaps for cleaning every 3-6 months.
- Heavy gaming or shared use: Every 1-2 months.
- If you eat at your desk: Every month.
Quick wipes with a microfiber cloth can be done weekly. Full removal and deep cleaning should be less frequent but regular.
Credit: www.youtube.com
Advanced: Replacing And Upgrading Keycaps
Once you learn how to remove keycaps, you might want to replace them with new ones for a custom look or better feel. There are many options on the market, from colorful PBT sets to artisan keycaps.
When buying new keycaps:
- Check that they are compatible with your keyboard layout (ANSI, ISO, etc. ).
- Make sure the keycap stem matches your switch type (most common: Cherry MX style).
- Buy from trusted brands to avoid poor quality or sizing issues.
Some premium keycaps use dye-sublimation or double-shot molding, which makes the legends last longer. These are more expensive but worth it if you want a long-lasting upgrade.
What To Do If You Break A Keycap Or Switch
Accidents happen. If a keycap breaks or a switch feels loose after cleaning:
- Most keycaps can be replaced by buying singles from online stores or keyboard communities.
- If a switch is damaged, some keyboards allow hot swapping—you can remove and replace the switch without soldering.
- For fixed boards, you may need professional repair.
Avoid using glue or tape to fix keycaps—they will not last and can cause more problems.
Credit: keyreative.store
Real-world Examples: Cleaning Success Stories
Many users are surprised by how much better their keyboard feels after a deep cleaning. Some report that sticky keys return to normal, and the typing sound becomes crisper. One user on a keyboard forum shared that after removing the keycaps on a three-year-old keyboard, they found a layer of dust and crumbs that explained why some keys felt “mushy.
” After cleaning, the keyboard worked like new.
Another example: Office workers who share keyboards often notice fewer colds and illnesses after regular deep cleaning. A study by the University of Arizona found that shared keyboards can spread germs quickly, but regular cleaning reduces this risk by over 80%.
Two Non-obvious Tips Most Beginners Miss
- Check for different keycap profiles: Not all keycaps are the same height or angle. Some keyboards have sculpted profiles, where each row is shaped differently. Mixing these up can make your keyboard uncomfortable to use. Always keep keycaps in order or use a photo for reference.
- Clean stabilizer bars before reinstalling: Large keys often have metal stabilizer bars. These can collect sticky residue or rust over time. Wipe them with a bit of isopropyl alcohol before putting the keycaps back. This prevents squeaky or uneven keys.

Credit: www.wikihow.com
Safety Warnings And Precautions
- Never use bleach or strong chemicals on keycaps or your keyboard base. These can damage plastic and remove legends.
- Do not soak your entire keyboard in water. Only the keycaps are safe to submerge.
- Make sure the keyboard is completely dry before plugging it back in.
If you are unsure, always check your keyboard’s manual or contact the manufacturer for advice.
Comparing Cleaning Methods: Surface Vs. Deep Cleaning
Here’s a quick look at how regular surface cleaning compares to full keycap removal:
| Cleaning Method | Time Required | Effectiveness | What It Removes |
|---|---|---|---|
| Surface wipe | 2-5 minutes | Basic | Dust, surface oils |
| Compressed air | 5-10 minutes | Moderate | Loose crumbs, dust |
| Keycap removal | 30-60 minutes | Deep | All debris, sticky residue |
Deep cleaning gives the best results for both health and keyboard performance, but takes more time. Most people find that doing it every few months is enough.
Frequently Asked Questions
How Can I Tell If My Keyboard’s Keycaps Are Removable?
Most mechanical keyboards have removable keycaps. You can check your keyboard’s manual or gently try to lift a corner of a keycap with a keycap puller. If it does not move easily, stop—some keyboards, especially membrane types, are not designed for this.
Is It Safe To Wash Keycaps In A Dishwasher?
It is not recommended. Dishwashers use high heat and strong detergents that can warp or fade keycaps. Washing by hand in warm soapy water is safer and more gentle.
What Should I Do If A Key Feels Stuck After Cleaning?
Remove the keycap again and check for debris or misalignment. Clean the switch area with a soft brush or compressed air. If the problem continues, check the stabilizer bar or switch for damage.
Can I Remove And Clean Laptop Keyboard Keys The Same Way?
Laptop keys use a different mechanism, often with fragile scissor switches. Removing them is much harder and riskier. Only try this if you are experienced and have checked a guide for your laptop model.
Where Can I Buy Replacement Keycaps If I Lose Or Break One?
You can find replacement keycaps on sites like Amazon, mechanical keyboard specialty stores, or forums. Make sure to match the keycap profile, material, and stem type for your keyboard. For more details, see this helpful Wikipedia article on keyboards.
Taking the time to remove keycaps and clean your keyboard is one of the best ways to care for your device. With regular cleaning, you will enjoy a smoother typing experience, a better-looking keyboard, and a healthier workspace. Remember to work carefully, keep your tools handy, and don’t rush.
Your keyboard—and your fingers—will thank you.
Related Office Guides
Continue with these related workspace guides:
