
If your mouse feels slow, skips movements, or stops working, the sensor might need cleaning. Many people overlook this small part, but keeping the mouse sensor clean is key for smooth and accurate use. Whether you play games, work on designs, or just browse the web, a dirty sensor can cause frustration and mistakes. Cleaning your mouse sensor is a simple task, but you must do it carefully to avoid damage.
Below, you’ll find a detailed guide covering everything about mouse sensor cleaning. We’ll explain why it matters, how to do it safely, common mistakes, and tips to keep your mouse in top shape. You’ll also see comparisons between cleaning methods, learn about tools, and get answers to frequent questions.
Why Mouse Sensor Cleaning Matters
The sensor is the “eye” of your mouse. It tracks movement by reading the surface below. Dust, hair, and grime block this sensor, making it hard for the mouse to read movements. This can result in:
- Cursor jumps or lagging
- Loss of precision for gamers and designers
- Erratic behavior (sudden stops, double clicks)
- Complete failure if dirt builds up over time
Most modern mice use optical or laser sensors. Both are sensitive to tiny particles. Even a small speck can cause problems. Regular cleaning can extend your mouse’s lifespan, save money, and keep your workflow fast.
How Mouse Sensors Work
Understanding your mouse sensor helps you clean it correctly. Here’s a quick breakdown:
- Optical sensors use LEDs to shine light onto the surface. A camera inside reads changes in light patterns.
- Laser sensors use a laser beam instead of an LED. These read more details and work on more surfaces.
Both types need a clear path for the light. Anything blocking this path—dust, skin oil, or even a fingerprint—reduces accuracy.
Some newer gaming mice boast DPI counts up to 20,000 or more. High DPI means the sensor reads extremely fine movement, so even tiny dirt affects performance.
Credit: www.wikihow.com
Signs Your Mouse Sensor Needs Cleaning
Don’t wait until your mouse stops working. Look for these signs:
- Erratic cursor movement—the pointer jumps or skips
- Slow response—moving the mouse doesn’t match screen movement
- Unstable tracking—cursor shakes or moves when the mouse is still
- Lost connection—mouse disconnects, especially wireless models
- No movement—mouse doesn’t respond at all
If you notice these, check the sensor area first. Sometimes a quick clean solves everything.
Tools And Materials For Cleaning
Cleaning doesn’t require expensive tools. Here’s what you need:
- Microfiber cloth—soft and lint-free
- Cotton swabs—for hard-to-reach spots
- Compressed air—blows away loose dust
- Isopropyl alcohol (70% or higher)—removes grease and grime
- Soft brush—like an artist’s brush for gentle dusting
- Plastic toothpick—for removing larger debris
- Tweezers—to pick out hair or fibers
Avoid paper towels, regular tissues, and harsh chemicals. These can scratch the sensor or leave lint.
Step-by-step Mouse Sensor Cleaning Guide
Cleaning a mouse sensor is easy if you follow the right steps. Here’s how:
1. Unplug The Mouse
Always disconnect the mouse from your computer before cleaning. For wireless mice, remove the batteries or turn off the power. This protects the electronics and prevents accidental clicks.
2. Find The Sensor
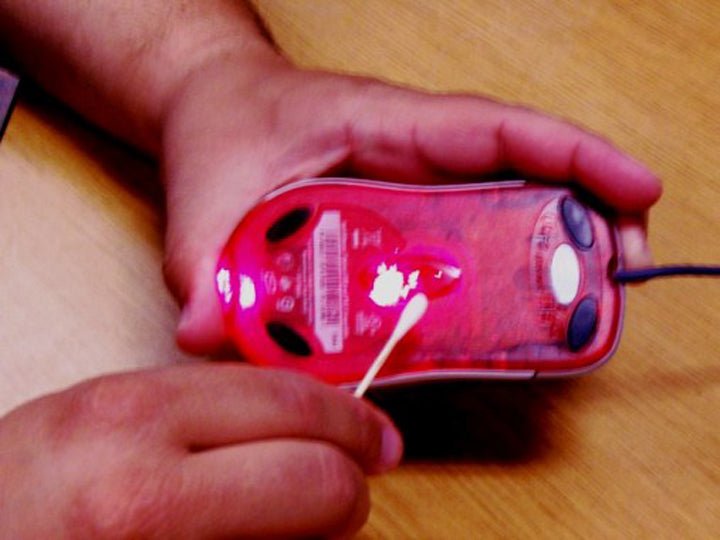
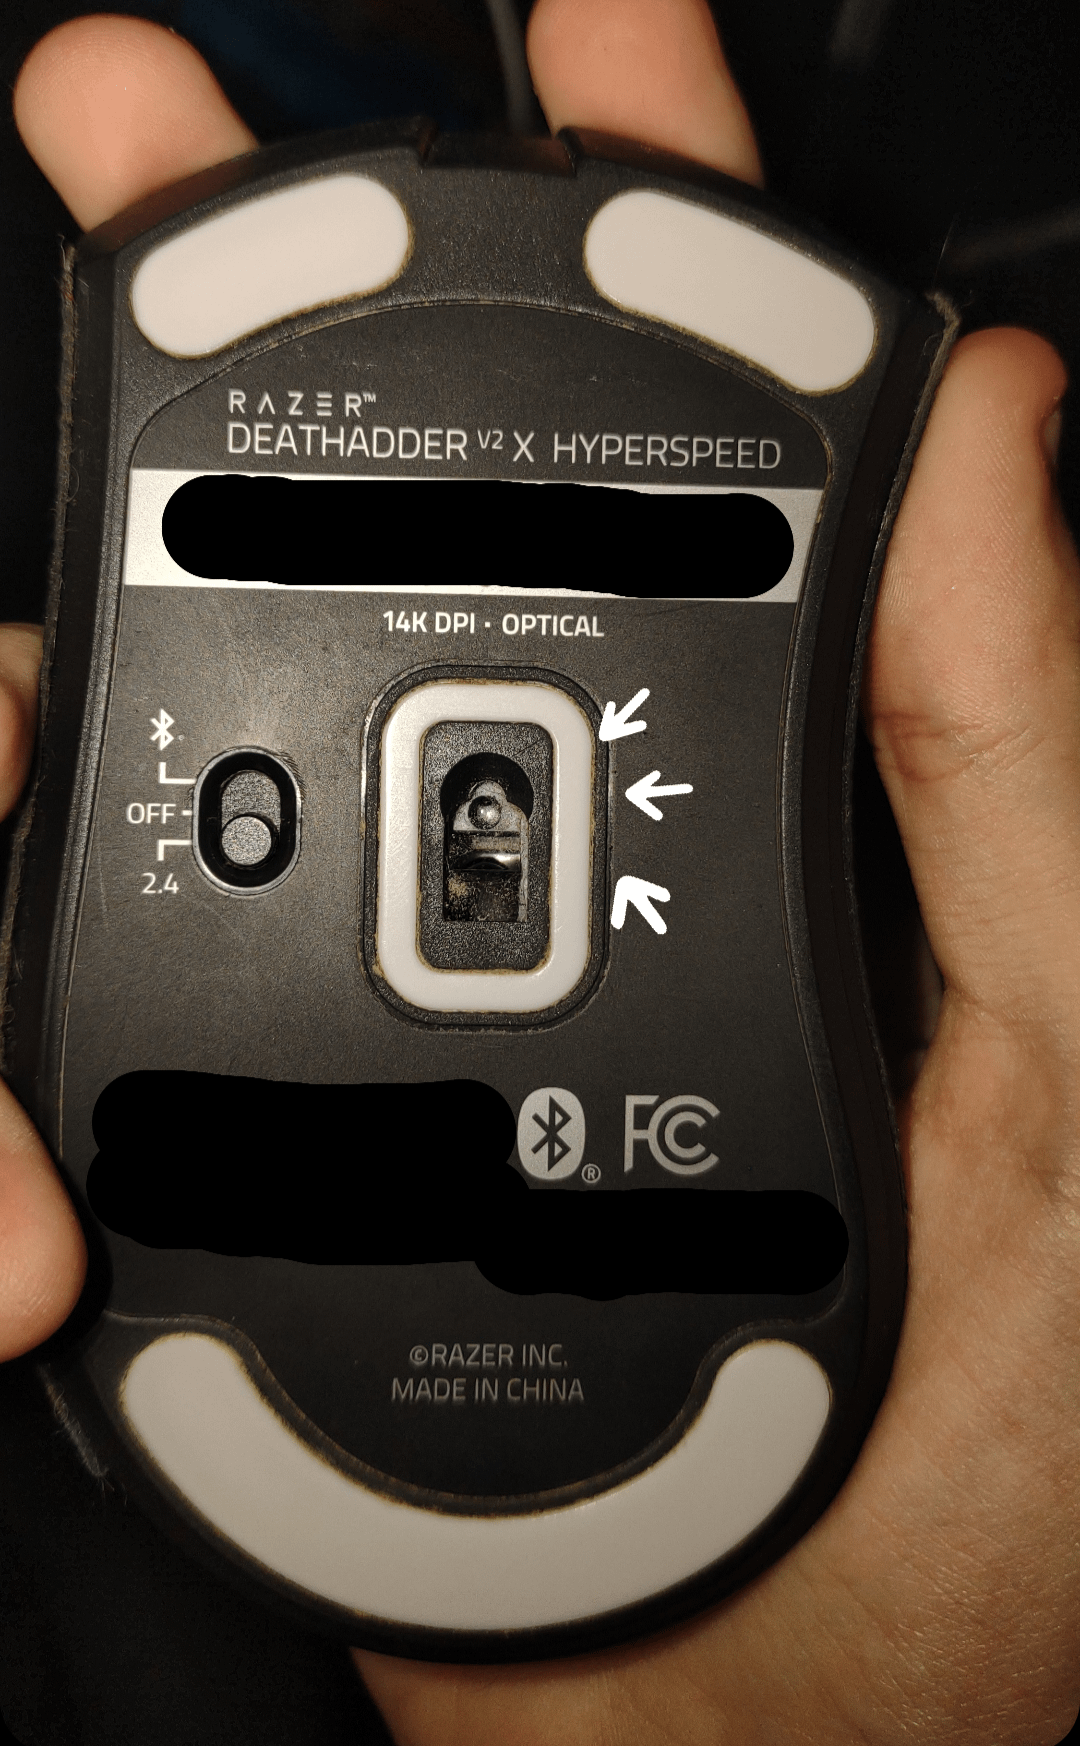
Flip the mouse over. Look for a small glass or plastic window near the center or bottom. This is the sensor area. It may be round or square, depending on the model.
3. Remove Loose Debris
Use compressed air to blow away dust, crumbs, and hair. Hold the mouse upside down and spray gently for 2–3 seconds. If you don’t have compressed air, gently shake the mouse.
4. Clean With A Microfiber Cloth
Dampen the cloth with a little isopropyl alcohol. Wipe the sensor area in small circles. Never soak the cloth or let liquid drip into the mouse. Alcohol evaporates quickly and leaves no residue.
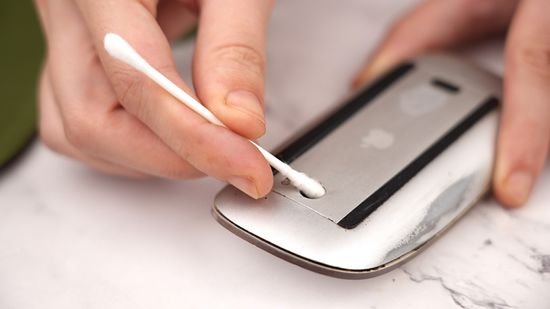
5. Detail With Cotton Swabs
For stubborn grime, dip a cotton swab in alcohol. Gently rub the sensor window, moving in circles. Use a dry swab to remove any leftover moisture.
6. Remove Stuck Particles
If you see hair or fibers stuck in the sensor opening, use tweezers or a plastic toothpick. Never use metal tools—they can scratch the sensor.
7. Brush Away Dust
A soft brush can help remove fine particles. Brush lightly around the sensor area, not inside it.
8. Let It Dry
Wait at least 1–2 minutes before plugging in or powering up your mouse. Alcohol dries fast, but moisture inside the mouse can cause damage.
9. Test The Mouse
Reconnect the mouse and check its performance. Move it on a clean surface and watch for smooth, accurate movement. If problems continue, repeat the cleaning or try a different surface.
Comparing Cleaning Methods
Different cleaning methods suit different types of dirt. Here’s a comparison to help you choose:
| Method | Best For | Risk Level | Effectiveness |
|---|---|---|---|
| Microfiber Cloth | Light dust, fingerprints | Low | Good |
| Compressed Air | Loose debris, crumbs | Very Low | Moderate |
| Cotton Swab + Alcohol | Sticky grime, oil | Medium (if too wet) | Excellent |
| Soft Brush | Fine dust, delicate cleaning | Low | Good |
| Tweezers | Stuck hair, fibers | Medium (if metal) | Excellent |
Microfiber cloths are safest for regular cleaning. Use cotton swabs for deeper cleaning but avoid pressing too hard. Compressed air is good for quick maintenance.
How Often Should You Clean Your Mouse Sensor?
Frequency depends on your environment and usage:
- Heavy users (gamers, designers): Clean every 2–4 weeks
- Office users: Once every 2 months
- Dusty environments: More often—every 1–2 weeks
If you notice performance drops, clean immediately. Also, clean after spills or if you drop your mouse.
Mouse Sensor Types And Cleaning Differences
Not all sensors are the same. Here’s a breakdown:
| Sensor Type | Cleaning Needs | Common Issues |
|---|---|---|
| Optical | Basic cleaning, avoid scratching lens | Dust, fingerprints |
| Laser | Gentle cleaning, sensitive to smudges | Micro debris, oil |
| Trackball (older mice) | Remove ball, clean rollers and sensor | Hair, sticky residue |
Laser sensors are more sensitive, so use a light touch. Optical sensors are less prone to deep dirt but still need regular wipes. For trackball mice, remove the ball and clean inside with cotton swabs.
Practical Tips For Better Cleaning Results
Cleaning isn’t just about wiping. These tips help you get better results:
- Use distilled water if you don’t have alcohol. Tap water can leave minerals.
- Clean on a white paper towel to spot debris easily.
- Avoid blowing with your mouth—saliva droplets can cause more problems.
- Never use glass cleaners or strong chemicals. They can damage coatings.
- Always clean your mouse pad too. Dirt from the pad transfers to the sensor.
- If your mouse is expensive or under warranty, check the manual for cleaning advice.
- For wireless mice, remove batteries before cleaning.
Many beginners miss the importance of cleaning the mouse feet. Dirt on these pads can rub against the sensor window, so wipe them too.
What Not To Do When Cleaning Mouse Sensors
Some mistakes can permanently damage your mouse. Avoid these:
- Soaking the mouse—liquid inside damages electronics.
- Using metal tools—scratches the sensor lens.
- Pressing too hard—cracks the sensor window.
- Using rough fabrics—leaves scratches and lint.
- Ignoring manufacturer instructions—may void warranty.
Always be gentle and patient. If dirt is stuck, repeat cleaning rather than forcing it.
Credit: www.whatgeek.com
Common Mouse Sensor Problems And Solutions
Even after cleaning, some issues may persist. Here’s how to fix them:
- Sensor not reading surface—try a different mouse pad. Some pads reflect light poorly.
- Cursor drift—check for magnets or strong electronics nearby. They can interfere with sensors.
- Double clicks—this is often a button issue, not the sensor. Clean the button area separately.
- Mouse disconnects—clean USB contacts and check for battery corrosion in wireless models.
- No response—try plugging into another computer. If still dead, the sensor may be damaged.
If problems continue, consider replacing the mouse. Sensors have a limited lifespan, especially in budget models.
Advanced Cleaning For Gaming Mice
Gaming mice have high-end sensors and more features. Here’s how to clean them:
- Remove any weights or removable covers before cleaning.
- Clean the sensor area and all buttons with alcohol wipes.
- Use compressed air for tight spaces, especially around scroll wheels.
- Check for firmware updates—sometimes performance problems are software-related.
- Don’t open the mouse unless you know what you’re doing. Opening may void the warranty.
Many gaming mice have RGB lights. Avoid liquid contact with these parts. If your mouse has a removable sensor lens, clean both sides.
Preventing Mouse Sensor Dirt Build-up
Regular cleaning is great, but prevention is better. Here’s how to keep your sensor clean longer:
- Wash hands before using your mouse. Oils transfer easily.
- Keep your desk clean. Dust and crumbs quickly reach the mouse.
- Use a quality mouse pad, preferably with a smooth surface.
- Store your mouse in a drawer or box when not in use.
- Avoid eating near your computer.
Some people use mouse covers or sleeves. While not common, they block dust and are useful in dusty offices.
Diy Cleaning Solutions: Pros And Cons
You may want to use homemade cleaning solutions. Here’s a quick comparison:
| Solution | Pros | Cons |
|---|---|---|
| Isopropyl Alcohol | Fast drying, removes oil, safe for electronics | Can dry plastics if overused |
| Distilled Water | Safe, leaves no residue | Less effective for oil and grime |
| Vinegar (Diluted) | Natural cleaner | Can damage plastics, strong odor |
| Soap Solution | Good for plastic body | Not suitable for sensor lens |
Isopropyl alcohol is best for sensors. Use distilled water for body cleaning. Avoid vinegar or soap on the sensor area.
Mouse Sensor Cleaning For Different Brands
Many brands have unique designs. Here are some examples:
- Logitech: Most models have a round sensor window. Use a cotton swab and microfiber cloth.
- Razer: Gaming models often have removable covers. Clean inside and outside.
- Microsoft: Optical sensors need gentle wipes. Avoid pressing on the glass.
- Corsair: High-DPI sensors, so clean more often. Avoid liquids near RGB zones.
- Apple Magic Mouse: Flat design, sensor near edge. Use a soft brush for corners.
Always check the manual for each brand. Some offer cleaning kits or recommend specific products.
Professional Mouse Cleaning Services
If your mouse is expensive or you’re unsure about cleaning, consider professional services. Many computer shops offer cleaning for $10–$30. They use special tools and guarantee safety.
Professional cleaning is best for:
- High-end gaming mice
- Rare or collectible models
- Mice with complex designs
However, for most users, home cleaning is enough.
Credit: www.reddit.com
Mouse Pad And Desk Hygiene
Your mouse sensor picks up dirt from the pad and desk. Keep these areas clean:
- Wash mouse pads regularly (check material for washing instructions).
- Wipe the desk with alcohol or mild cleaner.
- Avoid pads with loose fibers or rough surfaces.
A dirty pad can cause sensor errors even after cleaning. Invest in a quality pad with a smooth surface.
Sensor Calibration After Cleaning
Sometimes, cleaning affects sensor calibration. Here’s how to fix it:
- Open your mouse software (Logitech G Hub, Razer Synapse, etc. ).
- Run the calibration tool. Follow on-screen instructions.
- Set DPI to your preferred level.
- Test on different surfaces.
Calibration helps restore accuracy after deep cleaning. If your mouse doesn’t have software, test on plain paper and a mouse pad.
Mouse Sensor Longevity: Data And Statistics
Most modern mice last 2–5 years with regular cleaning. Gaming mice sensors can handle up to 50 million movements before accuracy drops. However, dirt can reduce lifespan by up to 30% if ignored.
A study by the International Journal of Computer Science found that regular cleaning improved sensor accuracy by 15–20% and reduced failure rates.
For more technical details, visit Wikipedia’s Computer Mouse page.
Mouse Sensor Cleaning For Special Environments
If you work in unusual places (workshops, labs, kitchens), follow these tips:
- Clean daily if dust or grease is present.
- Use protective covers.
- Store mouse in a sealed bag when not in use.
- Consider washable mice for extreme environments.
Non-obvious Insights Beginners Often Miss
Most guides skip these points:
- Dirt under the sensor window: Sometimes dirt slips underneath. If the window is removable, clean both sides.
- Mouse feet transfer dirt: Cleaning only the sensor ignores the feet. Dirty feet can block the sensor path, so wipe them every time.
- Static electricity: Rubbing plastic with dry cloth creates static, which attracts dust. Use a slightly damp cloth to avoid this.
Frequently Asked Questions
How Do I Clean A Mouse Sensor Without Alcohol?
You can use distilled water and a microfiber cloth. Wet the cloth lightly and wipe the sensor window in small circles. Avoid tap water, as it leaves mineral spots. For tough grime, use a dry cotton swab afterward.
Can I Use Regular Cleaning Wipes On My Mouse Sensor?
Most cleaning wipes contain chemicals that may damage the sensor coating. Stick to alcohol wipes or a microfiber cloth with alcohol. If you must use wipes, ensure they are alcohol-based and leave no residue.
How Often Should I Clean My Mouse Sensor?
Clean your sensor every month if you use your mouse daily. If you notice performance drops, clean sooner. In dusty environments, clean every 1–2 weeks. Gamers and designers may need more frequent cleaning.
Will Cleaning My Mouse Sensor Fix Double-click Issues?
Double-clicking is usually caused by a button problem, not the sensor. Cleaning the sensor can fix tracking issues but won’t solve double-clicking. Clean the button area with alcohol wipes or contact a repair shop.
Is It Safe To Open My Mouse For Sensor Cleaning?
Only open your mouse if the manufacturer allows it and you’re comfortable with electronics. Opening can void the warranty and damage internal parts. Most dirt is on the outside, so regular cleaning is enough.
Keeping your mouse sensor clean is simple but important. With the right tools and careful steps, you can keep your mouse tracking smoothly for years. Regular maintenance not only improves performance but also saves money and frustration. Remember to clean your mouse pad and desk, use gentle methods, and avoid harsh chemicals.
Your mouse will thank you with faster, more accurate movement every day.