Keeping a whiteboard eraser clean may seem like a small detail, but it can make a big difference in your workspace. A dirty eraser leaves behind smudges, reduces the life of your whiteboard, and makes your notes harder to read. Over time, dust and ink build up, which not only affects the look but can even transfer back onto the board. Many people use their eraser for months or even years without cleaning, not realizing that this simple tool needs regular care. If you want your whiteboard to look new and your notes to stay clear, it’s important to know how to clean whiteboard eraser the right way.
This article will guide you through every method—basic, deep cleaning, and even emergency hacks—so you can choose what works best for your eraser type and routine. You’ll learn why erasers get dirty, how to clean them with common items, and what to avoid to keep them in top shape.
Along the way, you’ll find real examples, common mistakes, and smart tips that most people miss. Whether you use your whiteboard at school, work, or home, keeping your eraser clean is easier than you think. Let’s dive in and make your eraser work like new again.
Why Cleaning Your Whiteboard Eraser Matters
A clean eraser does more than just wipe away ink. It keeps your whiteboard clear, helps your markers last longer, and even improves the life of the board itself. When erasers are dirty, they spread ink particles back onto the board.
This leads to gray smudges and ghost marks that are tough to remove. Over time, this can damage the board surface and make writing less visible.
Dirty erasers also collect dust, which can scratch the board. This is especially true for high-use boards in classrooms or offices. In some cases, the dust can even affect air quality in the room. If your eraser is full of ink and dust, every swipe is just moving the dirt around, not cleaning.
Most people don’t realize that a clean eraser also saves money. You’ll need fewer cleaning sprays, your whiteboard will stay smooth, and you won’t replace erasers as often. It’s a small step, but it keeps your tools working better for longer.
Types Of Whiteboard Erasers
Not all erasers are the same. The way you clean them depends on the material and design. Let’s look at the main types:
- Foam erasers: These are soft, lightweight, and absorb ink well. They’re common in classrooms and home offices.
- Felt erasers: Made from layers of felt, they are popular for heavy-duty use. Felt is durable but can trap ink deep inside.
- Magnetic erasers: Often attached to the board for quick use. They usually use foam or felt material.
- Microfiber erasers: These use fine fibers to pick up ink and dust. They are washable and gentle on the board.
- Disposable erasers: Made for one-time or short-term use. Usually found in small, cheap packs.
Each eraser type has different cleaning needs. For example, foam and microfiber can often be washed with water, while felt might need deeper cleaning. Knowing your eraser type helps you pick the safest and most effective method.
Credit: www.wikihow.com
Basic Cleaning Methods
For light dirt or regular upkeep, you don’t need special tools. Here are simple ways to clean your eraser:
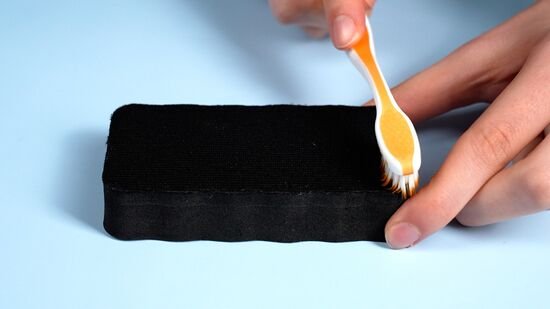
1. Tapping And Brushing
Hold the eraser over a trash bin and tap it gently against the side. This knocks out loose dust and ink particles. For a better clean, use a small brush (like an old toothbrush) to scrub the surface. Brush in one direction to avoid pushing dirt deeper.
2. Rubbing With A Cloth
Take a dry, clean cloth and rub the eraser’s surface. Microfiber works best, but any lint-free cloth will do. Move in circles to lift away ink. This method is safe for all eraser types and can be done daily.
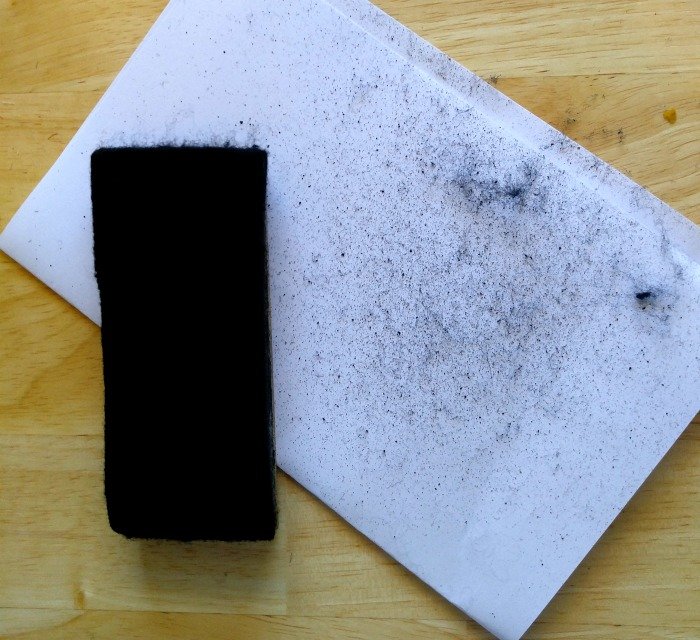
3. Using Tape
For foam or microfiber erasers, wide sticky tape (like packing tape) can pick up surface ink. Press the tape onto the eraser, then pull it off. The ink and dust will stick to the tape. Repeat with a new piece of tape if needed.
These methods are quick and prevent heavy ink build-up. They are ideal for weekly cleaning or after light use.
Deep Cleaning Methods
When basic cleaning isn’t enough, or you see gray smudges left by the eraser, it’s time for a deep clean. The method you use depends on the eraser’s material.
Cleaning Foam And Microfiber Erasers
1. Soapy Water Wash
Fill a bowl with warm water. Add a few drops of mild dish soap. Submerge the eraser and gently squeeze it to work in the soap. Let it soak for 5-10 minutes. Squeeze and rinse under running water until clear.
Air dry for at least 12 hours.
2. Machine Washing (microfiber Only)
Place the eraser in a laundry bag. Use a gentle cycle with cold water and mild detergent. Do not use bleach or fabric softener. Air dry completely before use.
Cleaning Felt Erasers
Felt holds ink deep inside, so surface cleaning doesn’t always work. Try these steps:
1. Dry Brushing
Use a stiff brush to scrub both sides of the eraser. Hold it over a trash can to catch dust.
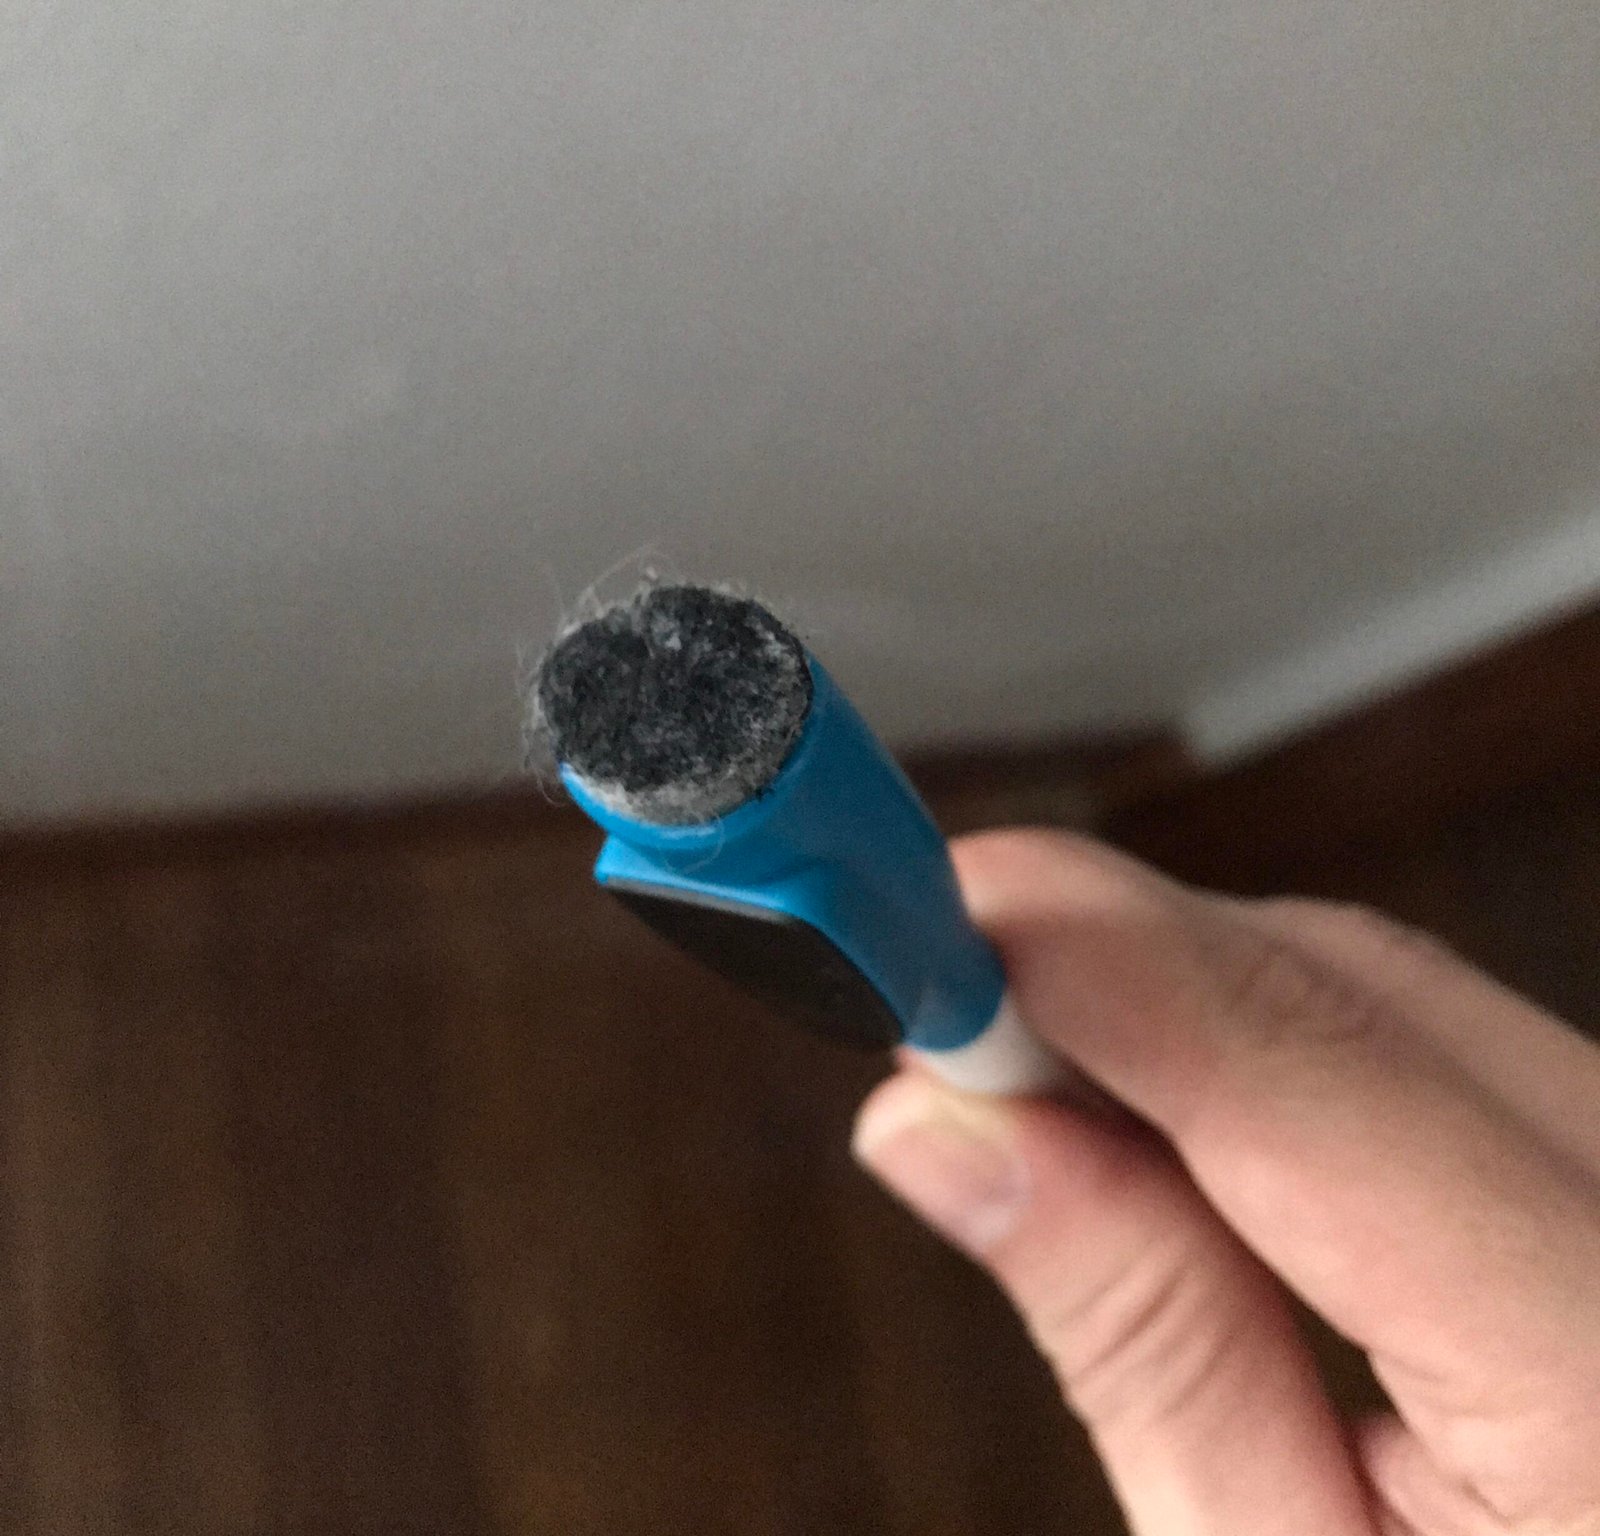
2. Vacuuming
Use a handheld vacuum with a brush attachment to suck out ink dust from the felt. Move slowly for the best results.
3. Soapy Wash (if The Eraser Has A Removable Cover)
Some felt erasers have covers that can be washed like foam. Check the label or manufacturer instructions first.
Cleaning Magnetic Erasers
Magnetic erasers use foam or felt, but the magnet can rust if wet. Never soak the eraser. Instead, wipe the surface with a damp cloth, avoiding the magnet area. Dry immediately.
Cleaning Disposable Erasers
These are not designed for cleaning. If they’re dirty, it’s best to replace them.
Emergency Cleaning Hacks
Sometimes you need to clean your eraser quickly, and you don’t have time for a full wash. Here are some fast fixes:
1. Hand Sanitizer
Put a small amount on a cloth and rub the eraser. The alcohol helps dissolve ink. Wipe again with a dry cloth.
2. Eraser-on-eraser
Rub two erasers together. The friction can lift off surface ink from both.
3. Compressed Air
If you have a can of compressed air (used for cleaning keyboards), spray it on the eraser to blow away dust and loose ink.
These are temporary fixes. For long-lasting results, always do a deep clean when you can.
Drying And Caring For Your Eraser
After cleaning, drying is key. Never use a wet eraser on your whiteboard—this can cause stains or damage the board. Place the eraser in a warm, dry area with good airflow. Do not put it in direct sunlight, as this can warp foam or fade felt.
For microfiber or foam, it can take 12-24 hours to fully dry. Felt erasers dry faster, but check that the core is not damp. If your eraser smells musty after cleaning, it wasn’t dried well enough.
Store your eraser in a clean, dry spot, away from dust and moisture. If possible, keep it attached to the board or in a drawer, not on the floor.
Credit: www.reddit.com
How Often Should You Clean Your Whiteboard Eraser?
There’s no single answer—it depends on how often you use your whiteboard. For daily use in offices or classrooms, clean your eraser weekly. For home or casual use, once a month may be enough.
However, if you notice smudges or the eraser isn’t working well, clean it right away. Regular cleaning prevents permanent stains and keeps your writing clear.
Here’s a simple guide:
| Usage Frequency | Cleaning Schedule |
|---|---|
| Daily (school/office) | Every week |
| Few times a week | Every 2 weeks |
| Occasional/home use | Once a month |
What To Avoid When Cleaning Whiteboard Erasers
Many people make mistakes that damage their erasers or whiteboards. Avoid these common errors:
- Using harsh chemicals: Bleach, strong cleaners, or acetone can break down foam and felt. Stick to mild soap or alcohol.
- Soaking magnetic erasers: This can cause the magnet to rust and stop working.
- Using heat to dry: Hairdryers, heaters, or direct sun can warp erasers.
- Scrubbing too hard: This can tear foam or wear out felt.
- Not rinsing soap completely: Leftover soap can leave marks on your board.
Always check the label or instructions if you’re not sure. If the eraser is expensive or custom, look up the cleaning advice from the manufacturer.
Credit: thegardeningcook.com
Natural And Eco-friendly Cleaning Options
If you want to avoid chemicals, there are simple, green ways to clean your eraser:
- Baking soda paste: Mix baking soda with a little water. Rub it onto the eraser and rinse well. Baking soda lifts ink without harsh chemicals.
- Vinegar rinse: Mix equal parts white vinegar and water. Soak a cloth and wipe the eraser. Rinse with plain water and dry.
- Sunlight (for drying, not cleaning): Sunlight can kill bacteria, but don’t leave erasers out too long or the material may fade.
Eco-friendly cleaning is safe for you and the environment. Most erasers respond well to these simple solutions.
How To Tell If Your Eraser Needs Replacing
Cleaning helps, but sometimes an eraser is too worn out to save. Here’s how to know:
- The foam or felt is torn, thin, or falling apart.
- Ink stains remain even after deep cleaning.
- The eraser leaves black or gray smudges on a clean board.
- It has a bad smell that doesn’t go away after drying.
- The magnet (if present) is broken or missing.
A good eraser should last 6–18 months, depending on use. Replacing it at the right time keeps your board in top shape.
Comparison: Cleaning Results By Method
Not all cleaning methods are equal. See how different methods stack up for common eraser types:
| Cleaning Method | Foam | Felt | Microfiber | Magnetic |
|---|---|---|---|---|
| Soapy Water | Excellent | Good* | Excellent | Poor* |
| Dry Brushing | Fair | Good | Poor | Fair |
| Sticky Tape | Good | Fair | Good | Good |
| Machine Wash | Poor | Poor | Excellent | Poor |
*Note: Soapy water is only good for felt if the cover is removable. Never soak magnetic erasers.
Smart Tips Most People Miss
Many guides skip these practical ideas that make cleaning easier and erasers last longer:
- Rotate your eraser: Use different sides each time. This spreads out wear and keeps one side from getting overloaded with ink.
- Label your erasers: In classrooms or busy offices, write your name or a color code on your eraser. This prevents mix-ups and cross-contamination.
- Clean both your eraser and board together: A dirty board can make a clean eraser dirty again and vice versa. Clean both at the same time for best results.
- Keep a backup eraser: While one eraser is drying after a wash, use a spare. This way, you’re never without a clean tool.
- Check your markers: Old or poor-quality markers leave more residue and make erasers dirty faster. Use high-quality, low-odor markers when possible.
- Set a reminder: Put a recurring event on your phone or calendar to clean your eraser. Most people forget until it’s too late.
These small steps save time and keep your whiteboard area neat and professional.
Real-world Example: Classroom Vs. Office Whiteboards
The cleaning needs of an eraser in a busy classroom are different from those in a quiet office. In schools, erasers get heavy use, often by many people. They pick up dust, chalk, and even germs. Teachers should clean erasers every week and have spares ready.
For offices, use is lighter, but ink build-up can still happen. Cleaning every two weeks is usually enough.
Here’s a quick comparison:
| Setting | Cleaning Frequency | Common Problems | Best Solution |
|---|---|---|---|
| Classroom | Weekly | Heavy ink, dust, germs | Soapy water + backup erasers |
| Office | Every 2 weeks | Ink build-up, marker residue | Dry brushing + microfiber cloth |
| Home | Monthly | Light dust, occasional stains | Basic cleaning, tape method |
When To Use Professional Cleaning Products
There are sprays and cleaners made just for whiteboards and erasers. These can work well for stubborn stains or if you have many boards to maintain. Look for products marked as safe for whiteboard surfaces and erasers. Avoid anything with bleach or strong solvents.
Professional cleaners are best for:
- Schools with dozens of whiteboards
- Conference centers or event spaces
- Boards that haven’t been cleaned in months
For most home or office users, homemade solutions and regular cleaning are enough.
If you’re curious about more details on whiteboard care, you can check the guidelines from the Wikipedia Whiteboard page.
Frequently Asked Questions
What Is The Fastest Way To Clean A Whiteboard Eraser?
The quickest method is tapping or brushing the eraser over a trash can to remove loose dust and ink. For a slightly deeper clean, use sticky tape to pick up surface ink. These methods only take a minute and are safe for all eraser types.
Can I Wash My Whiteboard Eraser In A Washing Machine?
You can machine wash microfiber erasers if the label says it’s safe. Use a gentle cycle with cold water and mild detergent. Never machine wash felt or foam erasers, as they may fall apart or lose shape.
Why Does My Eraser Leave Smudges Even After Cleaning?
If your eraser leaves marks, it may be too worn out or not fully dry. Sometimes, the board itself is dirty, or you’re using low-quality markers. Clean both the board and eraser, and check that your markers are still good.
How Can I Remove Permanent Marker From My Eraser?
Permanent marker ink is very hard to remove from erasers. Try rubbing alcohol or a little hand sanitizer on a cloth, then rub the stained area. If the stain won’t come out, it’s best to replace the eraser.
How Often Should I Replace My Whiteboard Eraser?
Replace your eraser when it’s falling apart, smells bad, or leaves marks after cleaning. For heavy use, this might be every 6–12 months. For light use, a good eraser can last over a year.
Keeping your whiteboard eraser clean doesn’t have to be a chore. With the right cleaning method and a few smart habits, you’ll enjoy a clear board and easy writing every time. Clean erasers make your workspace look better, save you money, and help your ideas shine.
Related Office Guides
Continue with these related workspace guides:
